
How to Clean Kitchen Cabinets in 2026: Protect the Finish First
Short answer: Dust dry first, then wash with warm water and a few drops of mild dish soap on a cloth wrung out hard, wiping with the grain from the top down. Rinse with a second cloth in plain water, then dry immediately with a third cloth, paying attention to seams, edges and hinges. For grease near the stove, let the soapy cloth sit for one to three minutes instead of scrubbing. Never use bleach, ammonia, a Magic Eraser, silicone furniture polish, disinfectant wipes or a solvent on a cabinet, and never use vinegar as a routine cleaner.
If you read this guide, you will know which finish your cabinets have and what it can and cannot take, the exact five-step wash, how to lift grease without scrubbing, how to clean the interiors, the hardware and the glass, and the honest test for when cleaning is not enough and the finish itself is failing — without buying anything new.
This guide contains no affiliate links and no product picks.

The things named here — dish soap, white vinegar, baking soda, a microfibre cloth, a soft toothbrush — are product types, not picks. This guide names no brands and carries no affiliate links.
Everything here uses ordinary household types, not brand-name products: mild dish soap, white vinegar, baking soda, a microfibre cloth, a soft toothbrush, and a vacuum with a hose attachment.
The good news is that keeping cabinets clean does not need expensive products or hours of work. It needs the right order, a gentle method, and the habit of drying. This guide starts with the two answers that decide your method — what finish you have, and what the vinegar question really means — then gives the exact five-step wash, the grease method, the interiors, the hardware, and the honest test for when cleaning is not enough and the finish itself is failing.
The short answer
Warm water and a little dish soap, applied in the right order, clean every kitchen cabinet. Dust dry first. Wash with a damp — never wet — cloth. Rinse the soap off with a second cloth. Dry immediately with a third.
The whole job takes about thirty minutes for an average kitchen. The deep clean, interiors included, is a longer job, but the weekly wipe that keeps cabinets looking new is ten minutes.
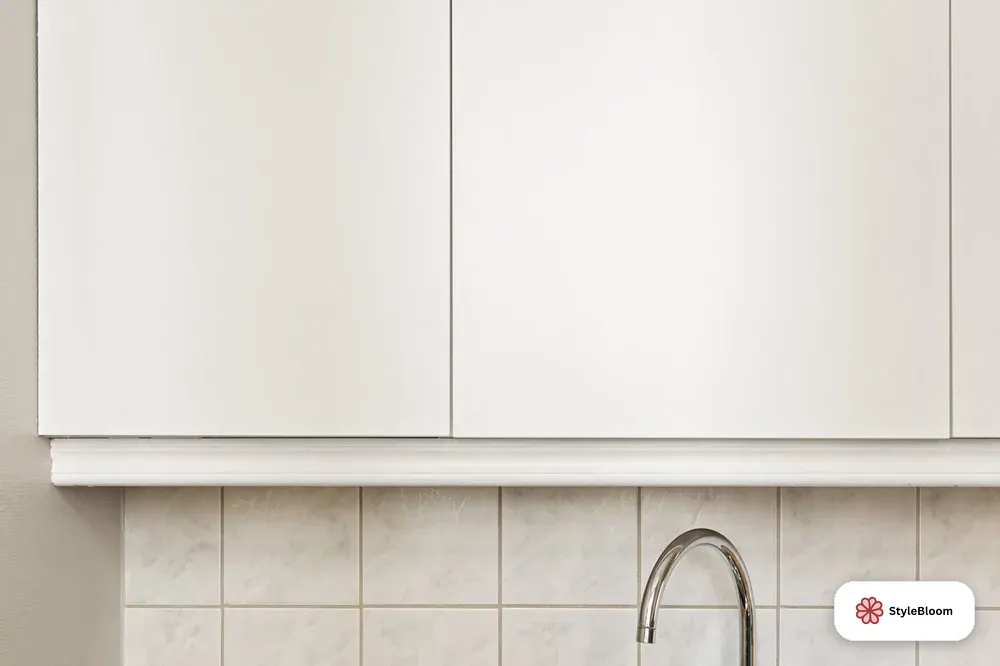
Pick your method: the finish decision table
Every cabinet in your kitchen has a finish, and the finish decides what you may use. The table below is the whole guide in one place. Find your finish, use its column, and skip everything in the what-to-skip section.
| Finish | What it is | What to use | What kills it |
|---|---|---|---|
| Painted wood | Several coats of paint over wood, satin or matt | Warm water, then mild soapy water; rinse; dry at once | Bleach and alkaline cleaners, solvents, Magic Erasers, silicone polish, standing water in joints |
| Stained wood | Wood with a stain and a clear protective coat | Warm water, then mild soapy water; rinse; dry at once | Bleach (lightens the stain in spots), ammonia (eats lacquer), abrasives, standing water |
| Laminate | A hard plastic surface bonded to board; the most durable finish | Warm water and mild soapy water; rinse; dry | Vinegar and baking soda, abrasive pads, solvents |
| Thermofoil | A vinyl film heat-sealed over board, often white | Warm water and mild soapy water; rinse; dry | Heat, harsh chemicals, abrasives, excess water at the edges |
| Lacquer | A hard clear coat, often inside cabinets and on drawer boxes | A dry cloth for dust; warm water for marks; dry at once | Vinegar and citrus acids, ammonia, alcohol-based sprays, abrasives |
| Glass or mirrored doors | Glass panels in a wood or painted frame | Glass cleaner or vinegar-water sprayed on the CLOTH, never the glass; wipe both sides; dry | Abrasives, liquid sprayed directly on the glass (it seeps into the frame joints) |
If you do not know your finish, treat it as painted wood: the gentle method is safe on all of them, and the avoid list is the same. If your cabinets are rented and you cannot ask the landlord, photograph them before you start — every chip, every cloudy patch, every peeling edge — so a mark you did not make is never blamed on your cleaning.
What a cabinet finish actually is
A cabinet finish is a thin skin — paint, lacquer, vinyl or stain — sitting on wood or board, and its job is to keep water, grease and hands away from the wood underneath. Cleaning a cabinet is therefore not about removing dirt from wood. It is about removing dirt from a thin skin without breaking it.
That is why the strong products fail. Bleach does not just clean a painted door; strong alkaline cleaners react with the chemistry of the paint itself. Vinegar does not just cut grease; acid reacts with lacquer and polyurethane over time, and the finish goes cloudy. A Magic Eraser does not just lift a mark; melamine foam is mildly abrasive at a microscopic level, and it takes paint with the grease.
Water is the quietest killer of all. A damp cloth is fine. Standing water is not. Water left sitting in a seam, around a hinge, or pooled at the bottom of a door seeps under the finish and swells the wood at the joint. Dry the cabinets after cleaning, every time, and the finish lasts decades. A hand-painted wooden kitchen, looked after well, should still look excellent twenty or thirty years after it was installed. The cleaning method is not what makes the difference. The habit does.
The vinegar question, settled honestly
Almost every cleaning article on the internet tells you to clean kitchen cabinets with white vinegar and water, usually half and half. Three of the five rivals in this guide say so. The other two say the opposite, and they are the two that matter most, because they are the people who build and warranty the cabinets.
One is a custom cabinetry maker whose guide was updated in October 2026. Its verdict is blunt: vinegar is acidic, and over time it strips polyurethane and lacquer finishes, leaving them cloudy. "The internet loves vinegar for everything. Don't use it on cabinets." The other is a bespoke kitchen maker whose guide was updated in November 2026. Its verdict is the same, in softer words: vinegar is a mild acid, acid reacts with paint chemistry over time, and warm soapy water is the better option. Occasional, well-diluted use is fine. As a regular cleaner, no.
Here is our verdict, and it follows the makers. Dish soap and warm water is the default, every time, on every finish. Vinegar is not the default. Use it occasionally and well diluted if you like — a splash in water for a glass door, for example — but never as the routine cleaner, never on laminate, and never on a lacquered interior.
The same logic settles bleach. One rival quotes a cleaning expert from a bleach company saying even bleach and water can be appropriate when the protective finish is in good condition. That same rival's own tips section, in the same article, says do not use any products that contain ammonia, bleach or solvents. The article contradicts itself. The makers, and every other rival, agree: bleach lightens stained cabinets in spots, reacts with paint chemistry, and belongs nowhere near a cabinet. Never use it, and never mix it with anything — not ammonia, not vinegar, not rubbing alcohol, not hydrogen peroxide.
The kit: what to keep at home
| Item | What it does | Why this one |
|---|---|---|
| Three microfibre cloths | One soapy, one rinse, one dry | Microfibre lifts dirt and moisture without leaving threads in beading and mouldings; paper towels are too rough for repeated use and leave fibres caught in the detail; a regular sponge holds more water than you need |
| A bowl of warm water | The wash and the rinse | Warm is enough — hot water dries on the surface faster, leaving marks |
| Mild dish soap | The only cleaner you need | A few drops in warm water; pH neutral, so it is kind to wooden surfaces |
| A soft dry brush or old toothbrush | Dust in beading, mouldings, hinge joints and hardware crevices | Soft bristles lift what a flat cloth cannot reach, without scratching the finish |
| A vacuum with a hose attachment | Tops of upper cabinets, interiors, shelf joints and corners | The upholstery nozzle reaches the back corners and along shelving joints where crumbs and dust hide |
| An old credit card or hard plastic spatula | Greasy dust caked on cabinet tops | Scrapes the hardened layer off without scratching; never use a metal scraper |
Three cloths, in order: soap, rinse, dry. That is the discipline of the whole method. The first cloth does the cleaning. The second takes the soap off. The third takes the moisture off.
Method 1: dust dry first, before any water
This is the step people skip, and it is the step that does the most damage when skipped. Wipe the cabinets with a dry microfibre cloth first, before any water touches them. Dust and grease together are a grinding paste: drag a wet cloth across a dusty door and the dust itself scratches the finish. Dry dusting first removes the grit, so the wet cloth that follows is cleaning, not sanding.
Pay attention to the moulding profiles, where dust collects thickest. Vacuum the tops of the upper cabinets with the hose attachment, or wipe them with a dry cloth. If the dust is mixed with grease and has hardened, scrape it off gently with an old credit card or a hard plastic spatula. Never use a metal scraper.
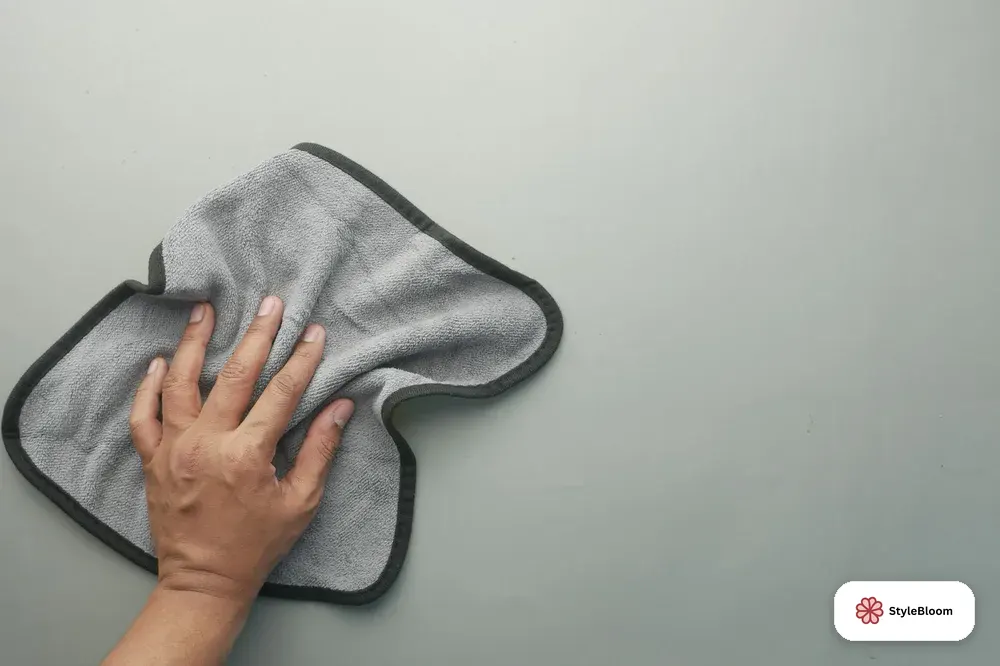
Method 2: the five-step wash
Two cups of warm water and one teaspoon of plain dish soap. That is the whole recipe. If you prefer a larger batch, two teaspoons of mild dishwashing liquid in a gallon of warm water is the same strength. A drop or two of soap is enough — more soap does not clean better, it only leaves more film to rinse off.
Dunk a microfibre cloth in the solution and wring it out hard. The cloth should feel damp, not dripping. Too much moisture can damage the paint or finish, and water that runs down a door ends up pooled at the bottom, where it seeps into the seam.
Wipe in the direction of the wood grain, working from the top of the cabinet down, so drips fall onto surfaces you have not cleaned yet. Spray the solution onto the cloth, never directly onto the door: liquid sprayed straight onto a cabinet can pool, streak, and seep into joints, and any streaks or pools you miss when drying may discolour a painted or wooden finish.
Now the step most people skip: rinse with a second damp cloth. Use a clean cloth dampened in plain warm water and wipe the same area again, to lift the soap off. Soap film left on a cabinet attracts dust and dulls the finish over time.
Dry immediately with the third cloth, a soft dry towel. Do not let the cabinets air dry — letting them air dry after rinsing can damage or bubble the finish. Wipe every surface dry, paying attention to edges, seams and the joints between door and frame. Sixty seconds with a dry towel after rinsing is the difference between cabinets that look new at year fifteen and cabinets that look tired at year eight. The same grease lands on the floor below, too. How to Clean Tile Grout: The Honest Guide (2026) covers the floor under your cabinets, where the drips and the cooking splashes end up.
Method 3: grease near the stove
The cabinets around your range will always be the worst. Grease aerosolizes when you cook, drifts up, and bonds to whatever it lands on. After a few months it is tacky. After a few years it is lacquered on. The cabinets either side of the hob and above the cooker need the weekly wipe more than any other surface in the kitchen.
For light buildup, the regular dish-soap routine works if you let the solution sit on the surface for a minute before wiping. Dampen the cloth in the soapy water, wring it out, lay it on the greasy spot, and leave it there. Then wipe with the grain. Repeat if needed.
For stubborn grease, mix a thicker paste — a tablespoon of dish soap with a tablespoon of warm water — and apply it with a soft cloth. Let it sit two to three minutes, then wipe with the grain. Do not scrub hard. Let the soap do the work. For really old, baked-on grease, a soft toothbrush in the corners and along the door profiles helps lift what a flat cloth cannot reach. Still no abrasives — just the bristles and the soap solution.

Method 4: the interiors
Empty the cabinet completely, moving everything to a dust-free place — a clean table, or the counter with a towel under it. Take the opportunity to check use-by dates on food, and if you find two packets of the same ingredient open and still in date, merge them into one packet or decant into an airtight container.
Vacuum or brush out the crumbs with a dry cloth, right to the back, into the corners, along the shelving joints. The upholstery nozzle is the right tool — it reaches where a cloth cannot. Then wipe the shelves and sides with the same warm-water method as the doors: damp cloth, wrung out hard, a few drops of soap if there are marks, then a rinse cloth, then dry.
Let the inside dry fully before you put anything back. Leave the doors open for an hour or two so the areas you cleaned dry completely. Interiors need this only two or three times a year, as part of a wider kitchen tidy — but when you do it, check that the shelf clips are not failing and the drawer slides are still smooth. A drawer that sticks is a drawer that will be forced, and a forced drawer damages its runners. Solid wood drawer boxes can be lifted out of their runners for easy cleaning; if a bottle has leaked or an item has tipped over, empty the drawer, wipe it clean, and let it dry thoroughly before refilling.
Method 5: the tops of the cabinets
Unless your cabinets fit flush to the ceiling, the very top of the wall units is where the worst kitchen grime lingers, out of sight and out of mind. Steam rises, grease settles, dust lands on top of the grease, and the layer hardens over months into something that looks like part of the cabinet. Dust the tops quarterly — they collect a surprising amount of greasy dust, and it hardens if you leave it too long.
Vacuum the tops with the hose attachment first. If the dust is mixed with grease, scrape the hardened layer off with an old credit card or a hard plastic spatula, then wipe with the same soapy cloth as the doors, rinse, and dry. Work from the top down, so anything that falls lands on surfaces you have not cleaned yet.
While you are up there, wipe the kick plate under the base cabinets too. A quick wipe with the soapy cloth, a rinse, and a dry is all it needs, once, when you deep clean.

Method 6: knobs, pulls, hinges and glass
Knobs, handles and drawer pulls are the most frequently touched items on a cabinet, so they carry the most grease — the oil from your hands accumulates on them every time you cook. Wipe them weekly with the damp cloth, using a little diluted dish soap on any stubborn spots of grease. A soft-bristled toothbrush dipped in the cleaning solution gets into the crevices around the handles and the edges of the doors, where a rag cannot reach.
Hinges need a dry cloth, not a wet one. Water seeping into a hinge rusts the metal, and a rusted hinge is a hinge that will not close properly — and a door that does not close completely is a magnet for grease and dirt. Wipe the hinge with a dry microfibre cloth. Never let water sit on hardware.
Metal hardware has its own rules. If it is lacquered brass, it needs nothing more than the occasional wipe with a damp cloth — brass polish, metal cleaners and abrasive pads are made for unprotected brass and will strip the lacquer. If it is unlacquered brass, copper or silver, it darkens and patinas with handling, and most owners leave it that way as part of the look. For a brighter finish, an occasional wipe with brass polish on a soft cloth is fine. Whatever the metal, avoid any cleaning agent that contains lemon or other acidic ingredients on unlacquered hardware — acid discolours the finish quickly.
Glass and mirrored doors: spray the cloth, never the glass. Spray a clean cloth with glass cleaner or a vinegar-and-water solution, then wipe the glass on both sides. Liquid sprayed directly onto glass can seep into the framework joints and cause damage or discolouration, and glass-cleaning solution dripping onto the woodwork can stain it. Polish to a shine with a dry microfibre cloth, and use nothing abrasive on the glass.
Method 7: stubborn stains on the doors
Some marks survive the wash: a dried tomato sauce splash by the stove, a coffee drip that ran down a door and dried, a sticky patch where a jar leaked. The answer is still patience, not a stronger product. Make a paste of two parts baking soda to one part water. Apply it to the stain, wait two to three minutes, then gently wipe the area. Baking soda is abrasive, so use a light touch — dab, do not scrub. After, rinse with a lightly dampened cloth and dry.
Tomato sauce is the most common kitchen cabinet stain, and it is the one people scrub hardest — which is exactly wrong on a painted door. Scrape any dried sauce off gently first, then let the damp soapy cloth sit on the mark for a minute before wiping, and repeat the soap-rinse-dry sequence. The stain guide covers the fabric version of the same spill: How to Remove Tomato Stains: The Honest Guide (2026) — scrape first, rinse cold, dish soap on the fat-soluble pigment, then enzyme or oxygen bleach, and never the dryer until it is gone.
For a sticky patch — grease, sugar from cooking, or a build-up of cleaning product residue — the warm soapy water method with the soap-rinse-dry sequence lifts all three. If a mark will not lift after three patient passes, stop: the problem may be the finish, not the dirt, and the finish-failure test in the next section tells you how to tell.
Set-in grease: old, washed-in and lacquered-on
Grease that has sat for years does not come off in one pass, and no product you are allowed to use on a cabinet will strip it in one pass. The method is the same as for fresh grease, repeated: soapy cloth, sit, wipe with the grain, rinse, dry — then again. Two or three passes, a minute or two of sitting each time. The soap needs contact time to soften the bond; scrubbing hard does not speed it up, it only risks the finish.
For really old, baked-on grease around the stove, a soft toothbrush in the corners and along the door profiles lifts what a flat cloth cannot reach. If the grease is so thick that the surface feels tacky after three passes, the layer may be lacquer rather than grease — years of cooking steam bonded into a hard coat. That coat does not wash off. It is the finish failing, and the next section explains what to do about it.
When the finish changes the steps
The gentle method is safe on every finish, but each finish has one thing that changes the routine. Laminate is the most durable finish and the most forgiving of a damp cloth, but it is the one finish where vinegar and baking soda are banned outright — they dull and pit the surface.
Thermofoil — the vinyl film heat-sealed over board, usually white — hates heat and excess water at the edges. Keep the cloth wrung out hard, keep water away from the edges where the film meets the board, and never use a hot cloth on it. Lacquered interiors and drawer boxes need almost nothing: a dry cloth for dust, warm water for a mark, dry at once. Lacquer is wipeable and needs no oiling, waxing or any other treatment.
Glass and mirrored doors are cleaned as a separate job from the wood around them, because the liquid that cleans glass stains wood. Spray the cloth, wipe the glass, dry the glass, then wipe the frame with the plain damp cloth and dry it. Never let glass cleaner drip onto the woodwork.
If your cabinets are rented, the finish rules matter twice as much: you cannot refinish a landlord's cabinet, and a damaged finish comes out of your deposit. Use only the gentle method, and tell the landlord about peeling or water damage instead of trying to fix it yourself. A peeling edge is not dirt. No cleaner fixes it, and scrubbing it only makes the peel bigger.
Keeping cabinets clean: the routine that saves the most work
After all that work, you want to keep your freshly cleaned cabinets clean, and the routine is smaller than the deep clean. Wipe the cabinet fronts with a damp cloth every week or so — the fronts near the stove weekly, with a full clean monthly; the fronts elsewhere as spots happen, with a full clean every two or three months. If you spot a spill or a splash, tackle it immediately. A more thorough deep clean, inside and out, once or twice a year is enough, or you can tackle one cupboard at a time throughout the year.
Three habits do most of the work. First, close the doors: never leave cabinet doors open — grab what you need, then immediately close them, because that is the best way to keep the interiors clean. Second, catch the grease at the source: use a splatter screen and turn on the exhaust fan when frying, because the fan pulls the grease-laden steam out before it settles on the cabinets. Third, keep the shelves clean by using shelf liners and wiping bottles and jars before returning them to the cabinet — a sticky jar bottom is a sticky shelf by next week.
Clean spills immediately, and when you clean your countertops, check whether food or other mess has dripped onto the bottom cabinets; if it has, clean it up quickly, and wipe smears and fingerprints off the doors as soon as you see them.
The weekly wipe fits inside the routine you already have. Cleaning Schedule for Working Moms puts the cabinet fronts on the weekly list, ten minutes, one day a week — and the deep clean, interiors and tops included, sits on the seasonal list in Deep Cleaning Checklist: Room-by-Room Plan | StyleBloom, where the kitchen cabinets are one stop on the room-by-room plan.
What to skip: the moves that damage cabinets
Most cabinet damage is not caused by dirt. It is caused by the product someone reached for to remove the dirt. The table below is the avoid list in one place — every item on it has a rival that warns against it, and every item on it is still sold as a kitchen cleaner.
| Skip it | Why | Use instead |
|---|---|---|
| Bleach and bleach-based cleaners | Strong alkaline cleaners react with paint chemistry; bleach lightens stained wood in spots | Warm water and dish soap |
| Ammonia | Eats through lacquer; reacts with paint | Warm water and dish soap |
| Magic Erasers and melamine sponges | Very fine sandpaper at a microscopic level; lifts grease and paint together | A soft cloth and a toothbrush |
| Silicone furniture polish | Builds into a hazy film that attracts dust and is nearly impossible to remove | Nothing — a clean cabinet needs no polish |
| Disinfectant and anti-bacterial wipes and sprays | Alcohol and quaternary ammonium dry out and crack the finish; isopropanol interacts with water-based paint | Warm soapy water, then drying — enough to disinfect a cabinet surface |
| Citrus cleaners and Murphy Oil Soap | Acidic; same problem as vinegar on a finish | Warm water and dish soap |
| Strong solvents and degreasers | White spirit, methylated spirit, acetone, nail varnish remover and oven cleaner (sodium hydroxide) strip paint and lacquer | Warm soapy water, more time, more passes |
| Oven cleaner overspray | Sodium hydroxide in oven spray lands on the cabinets above and beside the oven | Cover the cabinets above and either side before spraying the oven — and clean the oven itself with the gentle method in How to Clean an Oven: The Honest Guide (2026) |
| Vinegar as a routine cleaner | Acid strips polyurethane and lacquer cloudy over time; banned on laminate | Dish soap and warm water; vinegar only occasionally, well diluted |
| Abrasive pads, steel wool, scouring pads, plastic brushes | Scratch every finish, including laminate | A microfibre cloth and a soft toothbrush |
| Mixing cleaners | Bleach with ammonia, vinegar, or rubbing alcohol makes toxic gas; vinegar with hydrogen peroxide makes a corrosive mix | One product at a time, rinsed between |
| Letting water sit | Standing water swells wood at seams and hinges, bubbles the finish | Dry immediately with the third cloth |
The method, in full
Here is the whole routine, start to finish, for an average kitchen in about thirty minutes. Dust dry first — doors, frames, tops, mouldings — with a dry microfibre cloth or the vacuum hose. Make the solution: two cups of warm water, one teaspoon of mild dish soap. Wring the first cloth out hard until it is damp, not dripping. Wipe with the grain, top to bottom, one cabinet at a time. Rinse with the second cloth, dampened in plain warm water. Dry immediately with the third cloth, edges and seams included.
Then the details: grease near the stove gets the sit — soapy cloth on the spot for one to three minutes, wipe, repeat. Stubborn grease gets the thicker paste, one tablespoon of soap to one tablespoon of warm water, two to three minutes. Hardware gets the toothbrush and the dry cloth; hinges get the dry cloth only. Glass gets the sprayed cloth, both sides, then dry. Interiors get emptied, vacuumed, wiped and left open for an hour or two to dry fully, two or three times a year.
Verdict: The finish is the asset, and the gentle method is how you keep it. Warm water, a little dish soap, three cloths in order — soap, rinse, dry — and the patience to let the soap sit instead of scrubbing. Vinegar is not the default, bleach never belongs on a cabinet, and the strongest product in the kitchen is the one that does the most damage. Clean one cabinet at a time, dry everything you touch, and the kitchen you have now is the kitchen you will still have in fifteen years.
What to try first: Wipe the cabinet fronts near the stove tonight with a damp soapy cloth, rinse, and dry — ten minutes, one cabinet at a time. Good looks like: the doors feel smooth under your fingers, no sticky film, no streaks, and the finish looks the same wet as dry. If it fails: the surface still feels sticky or looks cloudy after three patient passes — stop, because the problem is the finish, not the dirt. Learn next: Deep Cleaning Checklist: Room-by-Room Plan | StyleBloom — the deep cleaning checklist: a room-by-room plan for the whole house, with the kitchen cabinets in their place.
Frequently asked questions
- What is the best way to clean kitchen cabinets?
- Warm water and a few drops of mild dish soap on a microfibre cloth, wrung out hard, wiped with the grain from the top down — then a rinse with a second cloth dampened in plain water, then dry immediately with a third cloth. That is the method the cabinet makers use, and it works on every finish.
- Can I use vinegar on kitchen cabinets?
- Occasionally and well diluted, white vinegar is fine. As a regular cleaner, no — vinegar is a mild acid, and acid reacts with paint, lacquer and polyurethane over time, leaving the finish cloudy. Warm soapy water does the same job without the risk. Never use vinegar on laminate.
- Can I use bleach on kitchen cabinets?
- No. Bleach and other strong alkaline cleaners react with paint chemistry, lighten stained wood in spots, and belong nowhere near cabinetry. Keep them away, and cover the cabinets above and either side when cleaning the oven with a bleach-based product.
- How do I clean grease off kitchen cabinets?
- Let a damp soapy cloth sit on the grease for one to three minutes, then wipe with the grain. For stubborn grease, use a thicker paste — one tablespoon of dish soap with one tablespoon of warm water — let it sit two to three minutes, then wipe. Repeat if needed.
- How often should I clean kitchen cabinets?
- Wipe the fronts weekly — the ones near the stove weekly, with a full clean monthly; the rest as spots happen, with a full clean every two or three months. Deep clean inside and out once or twice a year. Interiors need only two or three thorough cleans a year.
- How do I clean the inside of kitchen cabinets?
- Empty them completely, vacuum or brush out the crumbs right to the back corners, then wipe the shelves and sides with the same warm-water method. Let the inside dry fully — leave the doors open for an hour or two — before putting anything back.
- What should I not use on kitchen cabinets?
- Bleach, ammonia, Magic Erasers, silicone furniture polish, disinfectant wipes, citrus cleaners, strong solvents such as acetone and white spirit, oven cleaner overspray, and abrasive pads or steel wool. All of them damage the finish in ways warm soapy water does not.
- Are Magic Erasers safe on cabinets?
- No. A Magic Eraser is melamine foam, which is mildly abrasive at a microscopic level — technically very fine sandpaper. It will lift grease off a painted door along with the paint itself. Use a soft cloth and a toothbrush instead.
- How do I clean sticky kitchen cabinets?
- Sticky cabinets are usually grease, sugar from cooking, or a build-up of cleaning product residue. The warm soapy water method with the soap-rinse-dry sequence lifts all three. If silicone polish is the cause, several passes may be needed, and do not reapply the polish afterwards.
- How do I clean painted kitchen cabinets without damaging them?
- Use the same gentle method as bare wood: a damp microfibre cloth, warm water, and a dry cloth straight after. Wring the cloth out well, wipe with the grain and light pressure from the top of the door, and dry each door as you go, including the edges and the frame. Try anything new on a hidden spot first, such as the inside edge of a door.
- How do I clean laminate kitchen cabinets?
- The same gentle method — warm water and mild soapy water, rinse, dry. Laminate is the most durable finish, but never use vinegar or baking soda on it, and never use an abrasive pad.
- How do I clean kitchen cabinet hardware?
- Wipe knobs, pulls and hinges weekly with the damp cloth and a little diluted dish soap on stubborn spots. Use a soft toothbrush for crevices. Wipe hinges with a dry cloth — water in a hinge rusts the metal. Unlacquered brass and copper need no lemon or acidic cleaner, which discolours them.
- How do I clean glass cabinet doors?
- Spray a clean cloth — never the glass — with glass cleaner or a vinegar-and-water solution, wipe both sides, and polish dry with a microfibre cloth. Liquid sprayed directly on glass can seep into the frame joints and discolour the wood.
- What if my cabinets still look dirty after cleaning?
- If you are scrubbing weekly and the cabinets still look tired, the issue is not cleanliness — it is the finish failing. Cloudy or chalky areas that do not wipe clean, a sticky feel that persists after washing, peeling at the edges, or water damage at the seams all mean the finish is past saving. The options then are refinish in place, reface with new doors, or replace.
- How long does it take to clean kitchen cabinets?
- About thirty minutes for an average kitchen, one cabinet at a time, with three cloths and a bowl of warm water. The weekly wipe is ten minutes. The deep clean, interiors and tops included, takes longer — but it only needs doing once or twice a year.