
Home Decoration Ideas: 7 Handmade Projects That Look Designed, Not Crafty
Seven handmade projects for walls, plants, light, and flowers — made in an evening or two, hung without damage, and finished to look designed.
By the end of this guide, you will be able to make a handmade decoration that fits your exact wall — and know which project fits your evening, your skill, and your lease.
As an Amazon Associate, StyleBloom earns from qualifying purchases. This guide contains affiliate links — it costs you nothing extra and keeps our content free.
The best home decoration ideas are the ones you make yourself, from materials you understand, hung in a way that comes down cleanly. Seven projects cover a whole home: a knotted wall hanging, painted pots, a gallery wall, paper decorations, handmade light, flower arrangements, and occasion pieces.
Most decorating lists hand you fifty ideas and leave you scrolling until you buy something generic. This guide gives you seven, each with what to make, who it suits, and where it goes wrong — the making companion to our decorating ideas on a budget guide. Every project uses a materials tier of under $25, $50, or $100. Check the live price on the product page before you order, and check what you already own first.
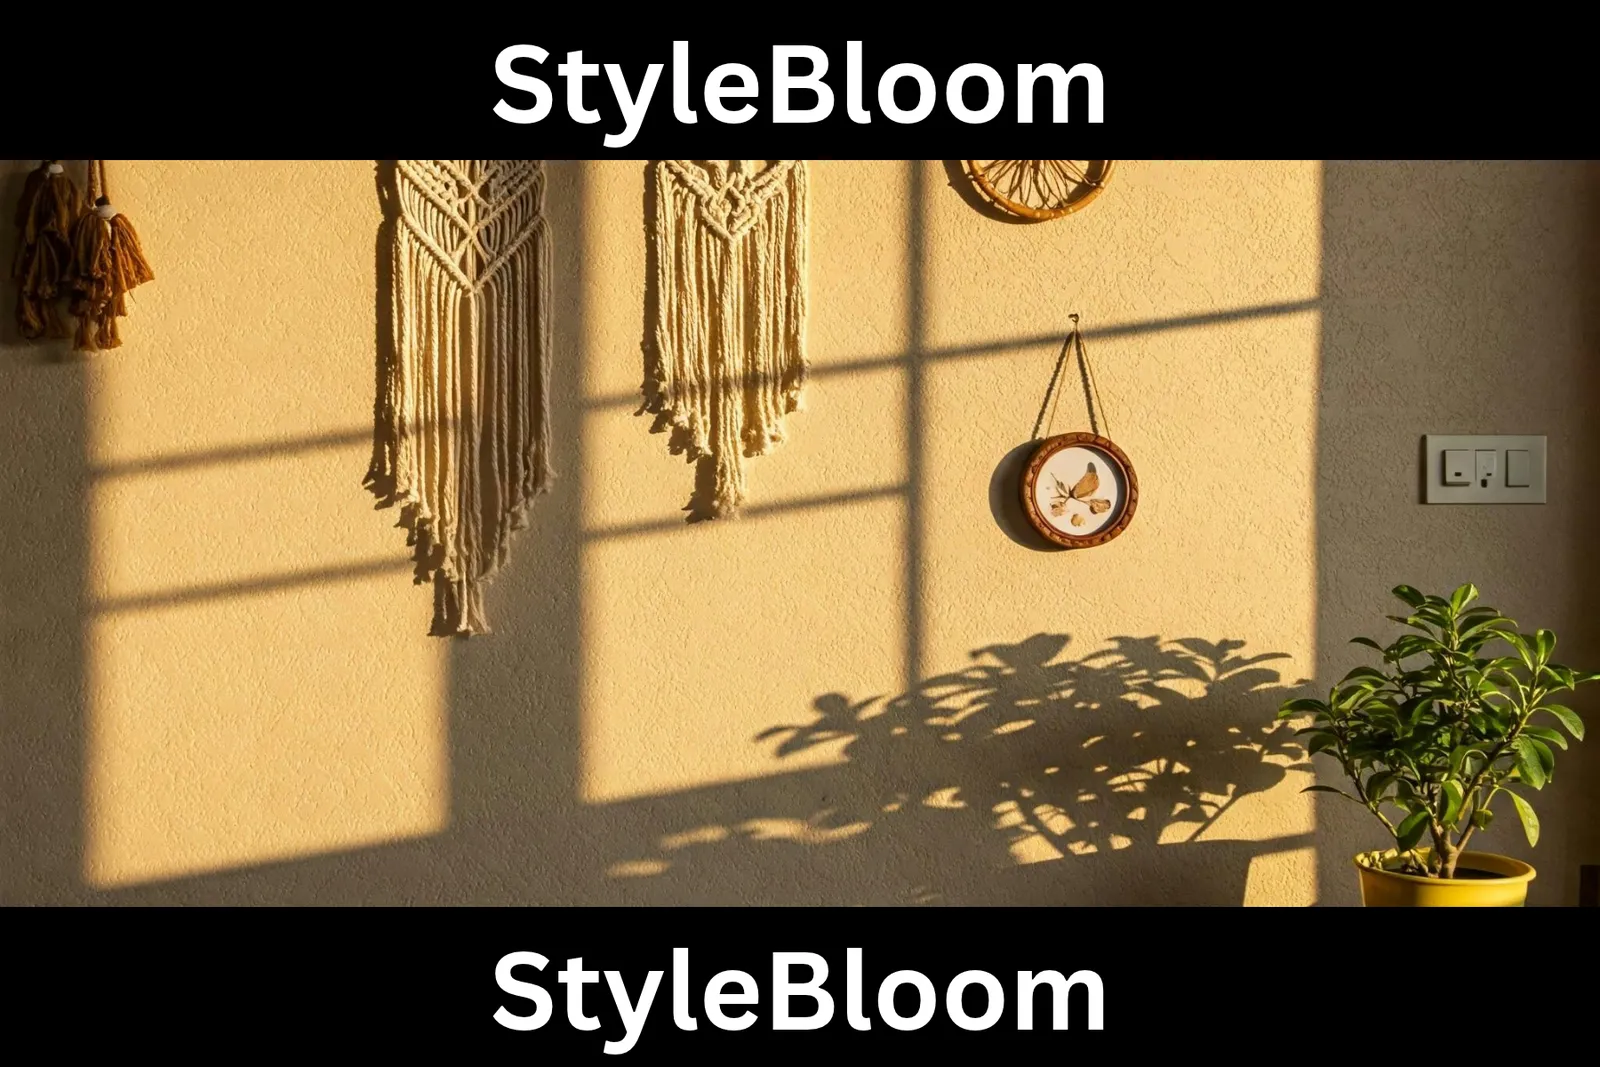
First win: Edit before you make anything. Remove one thing from every surface, move one piece to a different room, and live with the emptier version for a day — most rooms need less added, not more.
What are the best home decoration ideas?
The best home decoration ideas are the ones you make yourself, from materials you already understand, hung in a way your landlord will never need to know about. Not because handmade is morally better than bought — it is not, and this guide will happily send you to buy the one thing you cannot make well — but because a handmade piece carries the two things bought decor almost never does: the right size for your exact wall, and a story you can tell when someone asks where it came from. A wall hanging knotted over three evenings, slightly imperfect at the left edge, that fits the blank wall above your sofa to the inch, will beat a generic print in every room you ever live in. It fits because you made it for that wall. It matters because you remember making it.
This guide gives you seven handmade projects, not fifty ideas. Seven, because seven is enough to cover a whole home honestly — walls, plants, light, flowers, paper, occasions — and few enough that you can actually finish one this weekend. Every project follows the same shape: what to make, who it suits, what it honestly costs in time and skill, and where it goes wrong. The angle is handmade first, budget second, renter-safe throughout. If your main question is buying decor cheaply, our decorating ideas on a budget guide is the buying companion to this one — same honest process, room by room, built for shoppers. If your main question is hanging anything without drilling, our no-drill renter fixes guide goes deeper on fixings than this guide has room for. This guide is for makers: people who would rather spend an evening making the thing than an afternoon scrolling for it.
Where we link to Amazon, we may earn a small commission at no extra cost to you. We do not print prices, because prices move, so every project uses a budget tier of under $25, under $50, or under $100 for its materials. Check the live price on the product page before you order, and check what you already own first — half of these projects start in a drawer, a garden, or a charity shop bag, and buying materials you already have is the only decorating mistake that costs money twice.
How we picked these (honest version)
No sponsored placements. No craft brand paid to be here. No project included because it photographs well and fails in a real living room. Here is the actual process.
First, we required every project to be finishable by a beginner in one or two evenings, with tools most homes already have. A project that needs a workshop or a skill that takes a month to learn is not a weekend project. If the first attempt is expected to look rough — macramé knots, painted pots, paper flowers — the section says so, and tells you what the second attempt fixes.
Second, we required every project to be removable. Renters, small-home owners, and anyone who rearranges furniture when bored need decor that comes down cleanly. That rule shaped the hanging methods throughout: adhesive strips and hooks, tension rods, leaning pieces, washi tape. Where a project is heavy — a large wall hanging, a crate shelf, a big mirror — the section says how its weight is carried and what happens at move-out, because a handmade piece that damages the wall is not renter-safe, however beautiful it looks in the photo.
Third, we checked the finish honestly. Handmade decor fails in predictable ways: too many small pieces fighting for attention, visible glue and tape, colors that clash because every leftover was used at once, and scale that is too small for the wall it sits on. The mistakes section at the end of this guide names all five, with fixes. Every project section also ends on its own catch, in the same place, so you decide with both halves in front of you: what it gives, and what can go wrong with it.
Fourth, we kept the handmade claim honest. A project counts as handmade here if you make the visible thing yourself — the knots, the paint, the arrangement, the paper. Buying a cord, a pot, or a pack of paper does not make it bought decor; it makes it handmade with bought materials, which is how nearly all handmade decor works. What does not count is assembling a kit and calling it designed, or buying a finished piece and adding one ribbon. This guide is not against kits — kits teach skills — but a kit is practice, and this guide is about finished pieces for your walls.
At a glance — seven handmade projects
Start here. Find your wall, your evening, or your occasion in the first column, then read only that project's section. If two projects fit, make the quicker one first — a finished small piece teaches more than a half-finished ambitious one.
| Project | Best for | Time and skill | The catch, in one line |
|---|---|---|---|
| 1. Macramé wall hanging | A blank wall that needs one large, soft statement | Two or three evenings; beginner knots | First knots look rough — the second attempt is the keeper |
| 2. Painted terracotta pots | Plants in sad plastic pots; a windowsill or shelf | One afternoon; painting, no knots | Paint needs drying time — do not rush the second coat |
| 3. Handmade gallery wall | Photos, art, and paper you already own | One evening; arranging, no craft skill | Too many small pieces reads as clutter, not a gallery |
| 4. Paper decorations | Occasions, seasons, and a wall that needs color fast | One evening; cutting and folding | Cheap paper and visible glue undo the whole effect |
| 5. Handmade lighting | Dark corners and evenings that need warmth | One evening; no wiring, battery light only | Real candles near fabric are a fire risk — use flameless |
| 6. Flower and dried arrangements | A table, an entryway, a bathroom shelf | Under an hour; arranging only | Fresh flowers die; dried ones gather dust — pick knowingly |
| 7. Handmade for occasions | Birthdays and weddings, made personal | One or two evenings; paper and flowers | Occasion pieces must come down easily the day after |
The table is deliberately short. A longer table would feel thorough and decide nothing. This one decides something: which section to read first. The sections below follow the same shape every time — what to make, who it suits, budget and trade-offs — so you can compare a knotted wall hanging with a painted pot fairly, instead of comparing a glowing paragraph about one with a cautious paragraph about another. Same shape, same honesty, seven times.
Start by editing what you already own
Before you make anything, edit. This is the highest-impact decorating advice in this guide, it costs nothing, and it is the step nearly every decorating list skips because it cannot be linked to a product. Walk every room with a bag and remove one thing from every surface: the third candle, the frame you stopped seeing, the ornament that matched a home you no longer live in. Move one piece to a different room — the print from the hallway to the bedroom, the plant from the kitchen to the bathroom — and live with the emptier version for a day. Most rooms do not need more added. They need less competing for attention, so the one good thing in the room can finally be seen.
Good design depends more on proportion, balance, color, texture, lighting, and visual consistency than on price. A thrifted frame, positioned right, looks more intentional than an expensive object squeezed between three others. Edit what you already have before buying anything, give existing objects a new purpose, and concentrate your budget on a few high-impact details.
Editing also tells you what to make. An empty wall after the edit is a brief: it needs one statement piece, at the right scale, in one color family. A bare shelf is a brief: it needs height, texture, and one living thing. A dark corner is a brief: it needs warm light, not more objects. Write the brief down in one sentence — "the wall above the sofa needs one large, soft, warm piece" — and make to the brief. Decorating without a brief is how homes fill with small, unrelated, well-meant objects that add up to noise. Decorating to a brief is how a handmade piece looks designed: it was made for a place, in a size, for a reason, and the place shows it.
Project 1: A macramé wall hanging
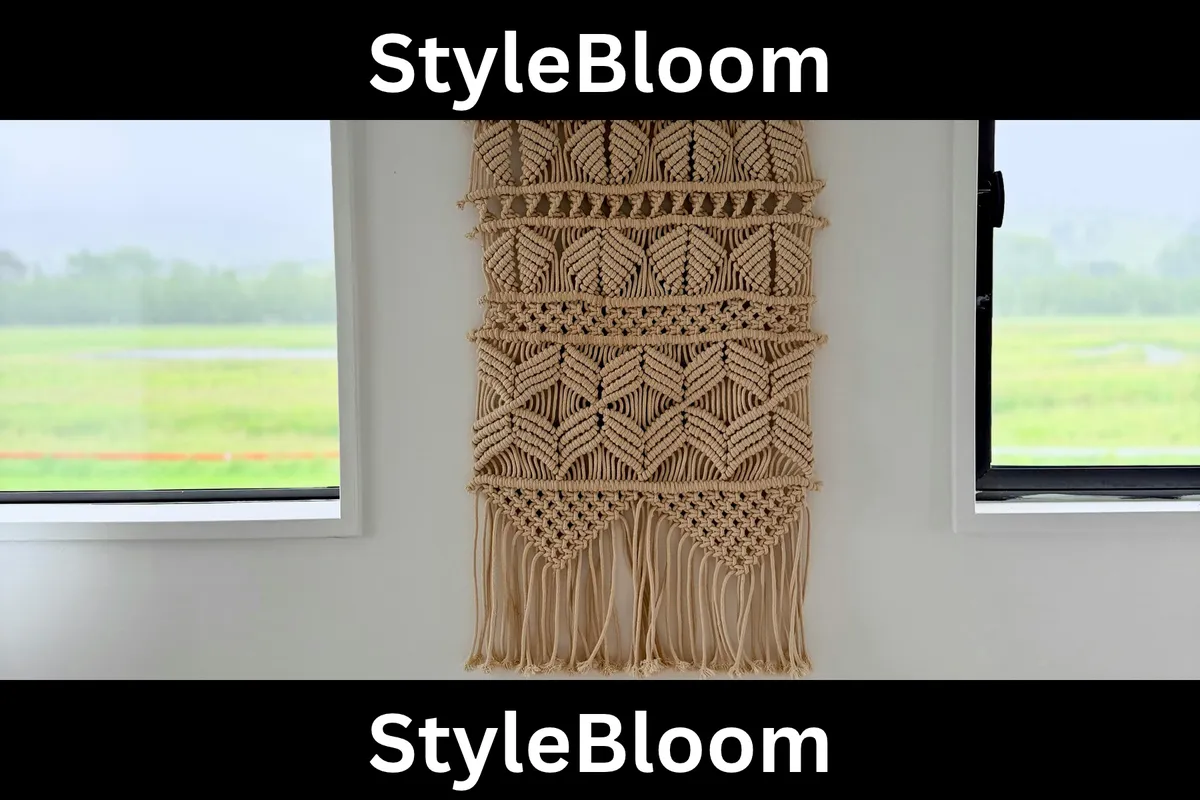
What to make
Knot a wall hanging from cotton cord on a wooden dowel: a row of simple square knots and half-hitches, widening or tapering to a point, hung from two adhesive hooks with the dowel carrying the weight. Start small — a piece about as wide as your forearm and as long as your arm — because a small finished hanging teaches the knots, and the knots are the whole skill. Your first knots will be uneven. That is not failure, it is attempt one, and attempt one is supposed to look handmade in the rough sense. The second attempt, with the same cord and the same tutorial, is the keeper: even tension, straight edges, a fringe you trim once, slowly, with sharp scissors, standing back every few cuts to check the line. Trimming is where most first hangings are ruined — cut a little, step back, cut a little more. You cannot uncut fringe.
Hang the dowel, not the fabric. Thread the dowel through the top loops and hang the rod from two adhesive hooks, which distributes the weight evenly, prevents sagging corners, and looks far more intentional than clips or pins. A single central hook lets the piece swing and twist; two hooks, level, keep it calm. For heavier woven pieces, use large picture-hanging strips or jumbo hooks rated for the weight, and always test the fixing on a hidden spot first. The hanging is part of the project, not an afterthought — a beautiful hanging on a failing hook is a wall repair waiting to happen, and wall repairs are the opposite of renter-safe.
Who it suits
This is the project for the blank wall that needs one large, soft statement — above a sofa, above a bed, in a hallway that echoes. It suits renters best of all the projects in this guide, because it is lightweight, it hangs from two hooks, and it comes down in seconds at move-out. It suits the maker who wants a visible skill at the end of the evening: knots you can feel, a finished piece you can hold up. It suits a home that needs texture more than color — a plain wall, a leather sofa, hard floors — where softness itself is the decoration.
Budget and trade-offs
- Under $25: cord and a dowel. The complete project, honestly — this is a low-material craft, and the low tier is the real tier.
- Under $50: cord, dowel, and proper hanging strips or hooks, plus a spare cord for the second attempt. Buy this tier if the hanging is large or heavy.
- Under $100: only if you are making several hangings, or one very large piece. Do not spend top tier on a first attempt.
Best for: one blank wall, renters, texture-hungry rooms. Skip if: the wall is damp, the household includes a cat that climbs textiles, or you need the wall finished tonight — knots cannot be rushed. The trade-off, stated plainly: the first attempt looks rough. Budget for two attempts in time, not money, and keep the first one — hung in a bedroom or a hallway, it looks charmingly handmade, and in a year you will be glad you kept it.
Project 2: Painted terracotta pots and plants
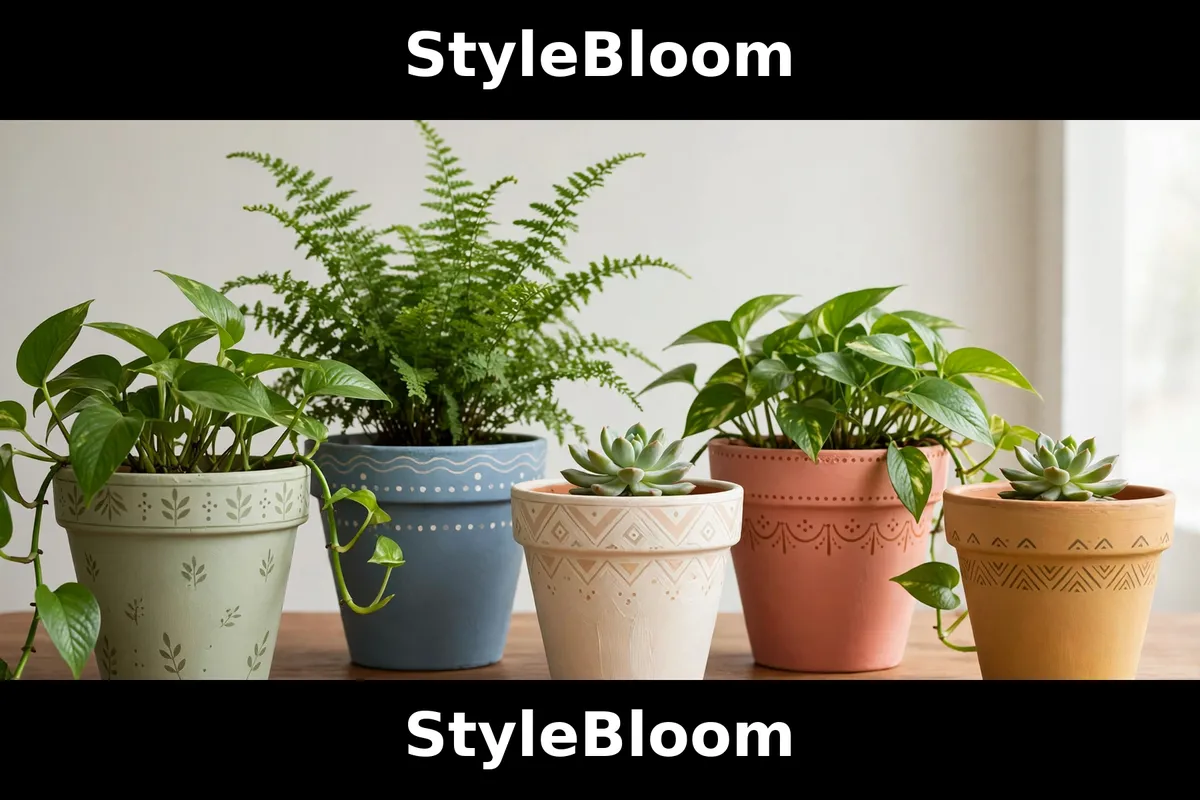
What to make
Paint plain terracotta pots and move your plants into them. Start with plants, because plants forgive you: a trailing plant in a painted pot, on a shelf or a stool, changes a whole corner for the price of paint and an afternoon. Choose one color family for all the pots in a room — warm white, sage, terracotta left bare with one painted band — and paint thinly, two coats, letting each coat dry fully. The most common failure is impatience: a second coat over a damp first coat peels, streaks, and looks worse than no paint at all. Terracotta is porous, so seal the inside if the plant will be watered in place, and always use a saucer — a painted pot that stains the shelf underneath it has decorated the shelf, not the plant.
Pair the pots with height. A plant on the floor, a plant on a stool, a plant trailing from a shelf: three heights read as designed, while three plants in a row on one sill read as a queue. Use what you already own for height — an overturned crate, a stack of books you actually read, a wooden stool — before buying a stand. The stool from the hallway, the crate from the kitchen, the books from the bedroom: height is everywhere once you look for it, and moving it costs nothing.
Who it suits
This is the project for the plant owner whose plants live in black plastic nursery pots, and for the windowsill or shelf that looks tired despite good light. It suits the maker who wants a finished result the same day, with no knots, no hanging, and no landlord involvement. It suits homes with children, because painting pots is a genuinely shared project — one pot each, one color family, no sharp tools — and the pots stay as evidence long after the afternoon is forgotten.
Budget and trade-offs
- Under $25: pots and paint. The complete project for two or three plants.
- Under $50: pots, paint, brushes, saucers, and one new plant to anchor the group. Buy this tier when the group is the point.
- Under $100: a full shelf group with stands. Only if the shelf, not the pots, is the project.
Best for: plant owners, same-day results, family making. Skip if: the room has no usable light for the plants you own — paint will not save a plant in the dark, and a dead plant in a beautiful pot is still a dead plant. The trade-off, stated plainly: drying time. Paint in the morning, plant in the evening, and do not water until the next day. Rushing any of those three steps is how paint ends up on the shelf.
Project 3: A handmade gallery wall
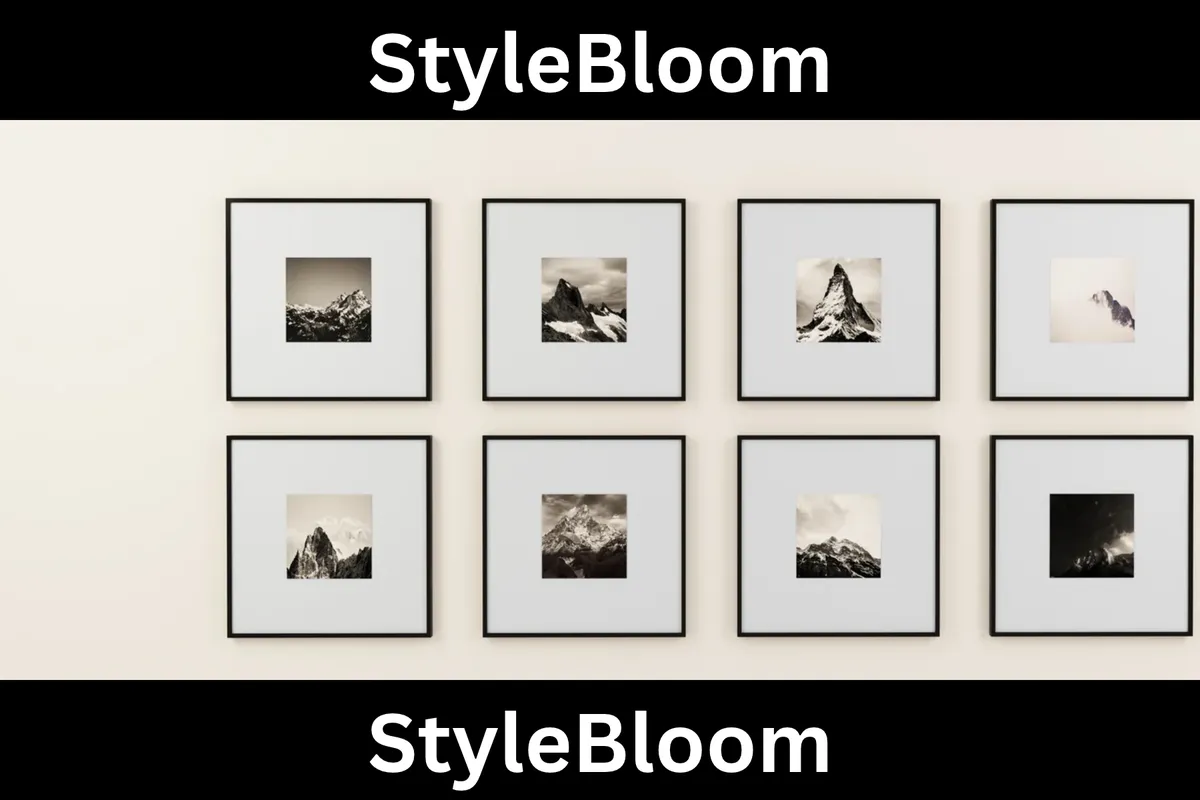
What to make
Build a gallery wall from what you already own: photographs, children's art, pressed leaves, a textile, one oversized piece. The rule that separates a gallery from clutter is scale: one powerful piece, large, at eye level, with empty wall around it, does more than ten small frames crowded together. Start with the oversized piece, then add smaller pieces at generous spacing, stepping back after each addition.
Hang without damage. Picture-hanging strips for frames, adhesive hooks for textiles and dowels, washi tape for paper pieces that will change with the seasons. Washi tape is low-tack paper tape that lifts off most painted walls cleanly, and it is the right choice for paper art precisely because paper art is meant to change — a child's drawing this term, a pressed leaf next term, a photograph after the holiday. For heavier frames, use strips rated for the weight, press firmly, and wait before hanging. The waiting is not optional: strips pressed and loaded immediately fail at night, loudly, and the frame is the least of what breaks.
Who it suits
This is the project for the person with a drawer of photographs and a blank wall, and for the family home where the walls should tell the family's story, not a shop's. It suits renters completely — every fixing here comes down cleanly when removed the right way — and it suits small homes, because a gallery wall uses vertical space that floor furniture cannot. It suits the maker who does not think of themselves as a maker: arranging is making, and a well-arranged wall is as handmade as any knot.
Budget and trade-offs
- Under $25: strips, tape, and hooks. The frames and art you already own do the rest.
- Under $50: fixings plus one or two thrifted frames in the right sizes. Buy this tier when scale is missing.
- Under $100: fixings, frames, and one oversized statement piece. Buy this tier only for the statement piece itself.
Best for: photo owners, renters, small homes, family walls. Skip if: the wall is heavily textured — adhesives grip only the raised areas, and full gallery walls fail there; lean large pieces against the wall instead. The trade-off, stated plainly: editing. A gallery wall needs you to leave pieces out. The photograph you love but that breaks the color family stays in the drawer, and the wall is better for it.
Project 4: Paper decorations that do not look like a classroom
What to make
Make paper garlands, paper flowers, and painted paper arches in one color family, at large scale. Scale is what separates designed paper decor from classroom decor: one large garland across a mantel, one oversized paper flower on a wall, one painted arch behind a plant — each reads as intentional because it is big enough to be seen as a decision. Ten tiny paper shapes scattered across a wall read as leftovers, however carefully cut. Paper is the cheapest material in this guide and the most unforgiving of mess: use good, heavy paper in two or three related colors, cut with sharp scissors, and hide every join. Visible glue, curled edges, and mixed brights are what make paper decor look temporary in the bad sense. Clean edges and a restrained palette make it look temporary in the good sense — made for this season, changed next season, on purpose.
Paper decorations are the right answer for color, fast. A rental with white walls and a landlord who forbids paint gets its color from paper: an arch painted directly on heavy paper and taped flat to the wall, a garland in the room's accent color, paper flowers in the vase when fresh flowers are out of season. When the season changes, the paper comes down in minutes and the wall is exactly as it was. That reversibility is the point, and it is why paper belongs in a renter's guide at all — not as a compromise, but as the fastest color a rental can have.
Who it suits
This is the project for the renter who needs color without paint, the parent who wants an afternoon project with visible results, and the host who needs a room transformed by the weekend. It suits small budgets completely — paper, tape, and scissors are the whole shopping list — and it suits people who change their minds, because nothing here is permanent and everything here is redoable next month.
Budget and trade-offs
- Under $25: the complete project, several times over. Paper is cheap; buy the good heavy kind, not the thinnest.
- Under $50: paper plus proper tape, a cutting mat, and a frame for the best piece. Buy this tier when the arch is the statement.
- Under $100: only for a whole-house occasion setup. Do not spend top tier on paper for one wall.
Best for: renters needing color, occasions, fast transformations. Skip if: the room is damp — paper curls and spots in humidity, and a bathroom paper garland is a short, sad life. The trade-off, stated plainly: paper shows every flaw. Sharp scissors, clean joins, and two colors instead of six are not fussiness; they are the difference between designed and disposable.
Project 5: Handmade lighting without wiring
What to make
Make warm light without touching the wiring: battery string lights woven through a handmade garland, inside glass jars, or along a shelf edge; flameless candles in holders you already own; a paper lantern over a battery light, never over a flame. Light is the highest-impact decoration in this guide after editing, because it changes how every other object in the room looks after dark. A dark corner with warm light becomes a reading corner. A shelf edge with a soft glow becomes a display. The same room, lit warmly, reads as finished in a way that daylight never quite proves.
Safety is the whole section, and it is not negotiable. Never put a real candle inside paper, near fabric, under a shelf, or anywhere it can be knocked by a child, a pet, or a curtain in a draft. Flameless candles exist precisely so handmade lighting does not need a fire risk to look warm, and modern ones flicker convincingly enough that guests will try to blow them out. Battery string lights need no outlet hunt and no cable across the floor — the two things that make plug-in lighting look messy in a rental. Keep batteries fresh, keep lights away from water, and keep the whole arrangement removable: light that cannot come down cleanly at move-out was never renter-safe.
Who it suits
This is the project for the dark corner, the north-facing room, and the evening person whose home only comes alive after sunset. It suits renters who cannot rewire, cannot add sconces, and cannot chase cables through walls. It suits the host, because warm light flatters guests, food, and photographs in a way overhead light never will.
Budget and trade-offs
- Under $25: string lights and flameless candles. The complete project for one corner.
- Under $50: lights for two rooms, with jars or holders to put them in. Buy this tier when light is the room's main decoration.
- Under $100: only for a whole-home lighting layer. Do not spend top tier on one shelf.
Best for: dark rooms, renters, evening homes, hosts. Skip if: the only safe placement is within reach of small children who will pull it down — light at floor level in a toddler's room is a hazard, not decor. The trade-off, stated plainly: batteries. Battery light needs fresh batteries and a habit of switching off, or it dies mid-evening and the corner goes dark. Rechargeable batteries pay for themselves in one season.
Project 6: Flower and dried arrangements
What to make
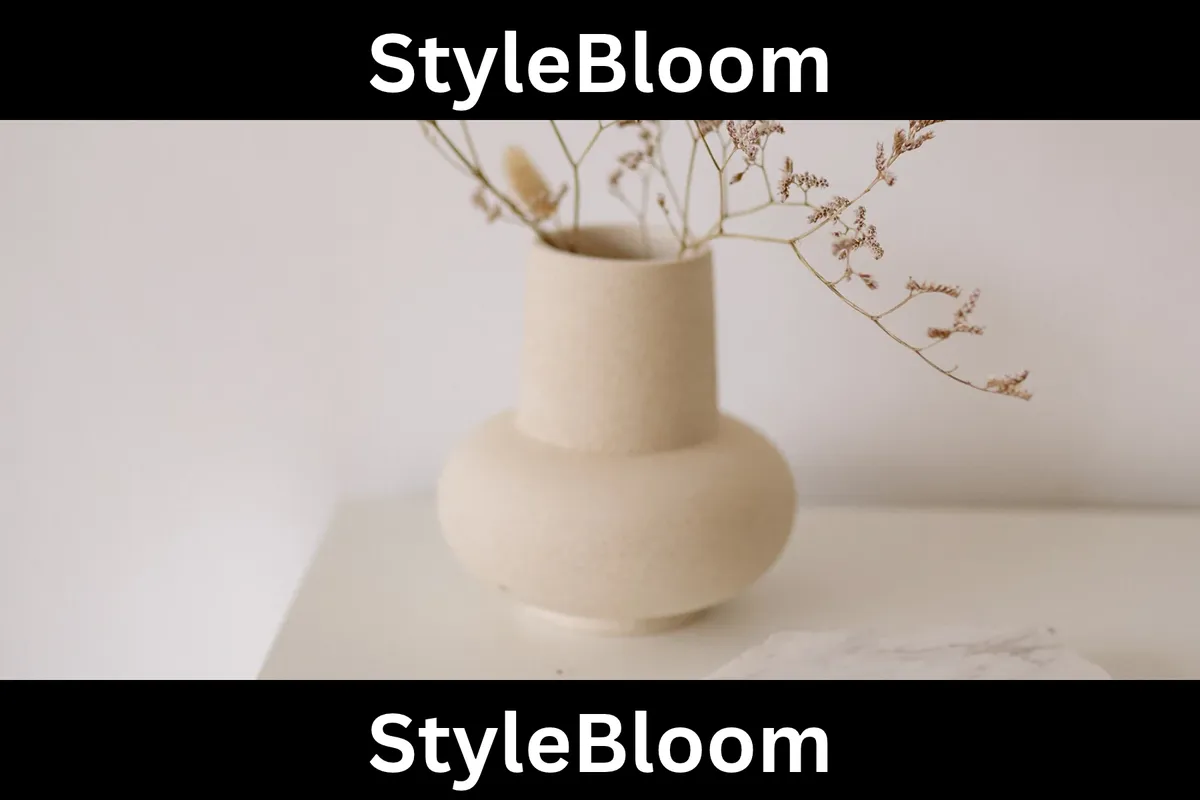
Arrange flowers — fresh, dried, or faux — in a vase you already own, at a height that suits the table. The arrangement rule is the same as the gallery rule: one statement, generous space, no clutter. Three stems of one kind, cut to different heights, beat twelve mixed stems fighting in one vase. Dried flowers and grasses last for months, need no water, and suit the maker who forgets to water; fresh flowers last days and suit the occasion; good faux stems suit the bathroom and the dark hallway, where nothing real will thrive. Choose knowingly, by room, not by habit: fresh for the dining table on the weekend, dried for the entryway all season, faux where light and water cannot reach.
Cut stems at an angle, strip leaves below the waterline for fresh arrangements, and change the water when it clouds — the unglamorous maintenance is what keeps fresh flowers from smelling like a pond by day four. For dried arrangements, keep them out of direct sun, which bleaches color unevenly, and dust them gently; a dusty dried arrangement is the fastest way to make a handmade home look neglected. For faux, buy fewer, better stems: three convincing stems beat a bush of shiny ones, and shiny plastic leaves are visible from across the room in a way no arrangement can hide.
Who it suits
This is the project for the table that looks bare, the entryway that needs a welcome, and the bathroom shelf that needs life without light. It suits the maker with under an hour, no tools, and no patience for knots or paint. It suits the forgetful waterer completely — dried and faux arrangements ask nothing after the first day.
Budget and trade-offs
- Under $25: a dried bunch or a few faux stems. The complete project for one vase.
- Under $50: arrangements for two rooms, with a proper vase. Buy this tier when the entryway and the table both need one.
- Under $100: only for a large occasion arrangement. Do not spend top tier on one shelf vase.
Best for: tables, entryways, dark rooms, forgetful waterers. Skip if: anyone in the home has strong pollen or fragrance sensitivities — dried grasses shed, fresh lilies scent a whole room, and the arrangement is not worth a headache. The trade-off, stated plainly: every kind of flower has a lifespan. Fresh dies, dried fades, faux dates. Pick the lifespan you will actually maintain, not the one that photographs best today.
Room by room: where handmade works hardest
In the living room, handmade works hardest on the largest blank wall and the darkest corner: one macramé hanging or one oversized gallery piece, plus warm string light along one shelf edge. In the bedroom, keep it calm: a soft hanging above the bed, painted pots on the sill, a flameless candle on the bedside table — one color family, muted.
In the kitchen and bathroom, handmade works hardest in small, humid-proof doses: painted pots with herbs in the kitchen, a dried arrangement and a small framed print in the bathroom, washi-tape paper art that can be replaced when steam curls it. Keep paper out of direct steam and candles — real ones — out of both rooms entirely. In the entryway, handmade works hardest as a welcome: a gallery of one oversized piece, a dried arrangement at hand height, and nothing on the floor to trip over. The entryway is the smallest room with the biggest job, and one handmade statement there sets the tone for the whole home. Our spa bathroom on a renter budget guide applies the same small-dose thinking to bathrooms specifically, if the bathroom is your main project.
Renter-safe hanging: the removal is the project
Every hanging method in this guide works only if its removal works. Adhesive strips must be pulled slowly and straight down, following the maker's instructions — outward pulls take paint with them. Peel-and-stick wallpaper must be removed at an angle, slowly, in a warm room. Test every adhesive on a hidden area first, and wait before committing to a whole wall, because smooth, textured, and freshly painted walls all react differently. Fresh paint must cure fully before any adhesive goes on it \u2014 cured, not just dry to the touch. Check the tin\u2019s cure time, which is measured in days or weeks, not hours, and wait it out even when the wall feels ready.
Prepare the wall before you stick anything. Clean with rubbing alcohol, not a household cleaner, which can leave residue that stops bonding. Press firmly for a good while, then leave the fixing alone for an hour before hanging anything heavy on it — strips loaded immediately fail at night, and the failure is always the frame you cared about most. Use the accent-panel strategy for wallpaper: one focal wall, or a strip behind the bed, not the whole room, because a full room is a removal project you will regret at move-out. And keep a move-out kit: spare strips, a clean cloth, and the instructions for every fixing you used, in one envelope, so the last week is a calm hour of removals, not a panicked evening of paint repair. Our no-drill renter fixes guide gives the full weight tables and move-out plan if you want the complete system.
Handmade for birthdays and weddings
For birthdays, handmade means paper garlands in the birthday person's colors, a photo display on a string with clips, and seasonal flowers on the table — all up in an evening, all down the day after. For weddings, the same skills at larger scale and calmer colors: paper flowers, dried arrangements, a garland over the doorway, one oversized piece behind the couple. Keep wedding handmade to three elements, in one palette, made ahead and stored flat.
Occasion pieces must come down easily the day after. That rule decides the fixings: washi tape and clips for paper, adhesive hooks for garlands, vases for flowers — nothing that needs patching, painting, or apologizing. Make a removal plan when you make the decoration, not after the party, when everyone is tired and the tape is coming off with paint. And photograph the finished room before guests arrive, in daylight and in evening light, because occasion decor is temporary and the photograph is how it lasts. The photograph, framed, becomes next year's gallery wall — handmade, twice over.
5 mistakes that make handmade look messy
1. Too many small pieces. Ten tiny objects on one wall read as clutter. One large piece reads as a decision. Scale up or edit down — there is no third option that works.
2. Visible glue, tape, and joins. Craft that shows its construction looks unfinished, not honest. Hide joins, trim threads, and use the right tape for the surface. Finish is not fussiness; finish is the craft.
3. Every color at once. Using every leftover at once guarantees clashing. Two or three related colors, repeated across the room, read as a palette. Leftovers stay in the box.
4. Wrong scale for the wall. A small hanging on a large wall looks lost, and a large hanging over a small sofa overwhelms it. Measure the wall, mark the size on paper, and hold the paper up before you make anything.
5. Unsafe electrics and flames. Real candles in paper, string lights near water, overloaded hooks over a bed — handmade must never trade safety for effect. Flameless light, tested fixings, and dry placements are not compromises. They are the project done properly.
Quick answers
What is the easiest handmade decoration? A painted terracotta pot with a plant, or a paper garland in one color family. Both finish in an afternoon, need no special skill, and teach you whether you enjoy making before you commit an evening to knots.
What handmade decor is safest for renters? Anything hung with picture strips, adhesive hooks, or washi tape, removed the slow way the maker specifies — plus leaning pieces and tension rods, which touch no wall at all.
How do I make handmade decor look expensive? Scale, restraint, and finish: one large piece, two or three colors, clean edges and hidden joins. An expensive look is mostly an edited look.
Can I decorate a rental without drilling? Yes, completely. This guide and our no-drill renter fixes guide cover walls, light, shelves, and surfaces with no holes at all.
What to try first: Edit one room, then make the project for its worst wall. Good looks like: one statement piece, generous empty wall, warm light in one corner. If it fails: edit harder and remake at larger scale. Learn next: Decorating Ideas at Home on a Budget — the buying companion to this making guide.
Frequently asked questions
- What are the best home decoration ideas for a small home?
- One large handmade statement per room, warm light in one corner, and plants at three heights. Small homes fail when every surface holds a small object. Edit hard, make one big piece per room, and let empty wall do the rest of the work.
- How can I decorate my home on a small budget?
- Start by editing what you own, then make one project per room from low-cost materials: paper, cord, paint, and plants. Our decorating on a budget guide covers buying cheaply; this guide covers making cheaply. Together they cover a whole home for very little money.
- What handmade decorations can beginners make?
- Painted terracotta pots, paper garlands, flower arrangements, and a small macramé hanging. All four finish in one or two evenings with beginner skills. Expect the first macramé attempt to look rough — the second attempt is the keeper, and that is normal.
- How do I hang decor without damaging rental walls?
- Use picture-hanging strips, adhesive hooks, washi tape, tension rods, and leaning pieces. Test on a hidden spot first, clean with rubbing alcohol, press firmly, wait before loading, and remove slowly the way the maker specifies. Removal is the project.
- Is peel-and-stick wallpaper renter safe?
- Yes, when it is applied to a suitable smooth wall, tested first, and removed slowly at an angle in a warm room. Use the accent-panel strategy — one wall or one strip — rather than a whole room, which becomes a large removal project at move-out.
- What is the best handmade wall decoration?
- A macramé wall hanging or a handmade gallery wall, at the right scale for the wall. One oversized piece with empty wall around it beats ten small frames crowded together. Measure the wall first, and make to the measurement.
- How do I make paper decorations look good?
- Use heavy paper in two or three related colors, cut with sharp scissors, hide every join, and work at large scale. One large garland or one oversized flower reads as designed. Ten tiny shapes in six colors read as leftovers.
- Are fairy lights safe in a rental?
- Battery string lights and flameless candles are safe when kept away from water, fabric, and small children who can pull them down. Never put a real candle inside paper or near curtains. Keep batteries fresh and switch lights off when you leave the room.
- What plants are best for handmade pot projects?
- Trailing plants and herbs, in pots you have painted in one color family. Match the plant to the light the room actually has — paint will not save a plant in the dark. Use saucers, seal porous pots, and water the day after painting, not the same day.
- How do I decorate a rental bedroom without drilling?
- One soft wall hanging above the bed on adhesive hooks, painted pots on the windowsill, and a flameless candle on the bedside table. Keep colors calm and muted, and keep everything removable, because bedrooms change with every move.
- Can handmade decor look expensive?
- Yes. An expensive look comes from scale, restraint, and finish: one large piece, a restrained palette, clean edges, and hidden joins. A thrifted frame positioned right looks more intentional than an expensive object squeezed between three others.
- What should I avoid when decorating a rental?
- Drilling without permission, adhesives on unsuitable or freshly painted walls, heavy pieces on untested fixings, real flames near fabric, and full-room wallpaper. Every one of these risks the deposit, and every one has a removable alternative in this guide.
- How do I decorate for a birthday on a budget?
- Paper garlands in the birthday person's colors, a photo display on a cord with clips, and seasonal flowers on the table. All three go up in an evening and come down the day after with no wall damage. Photograph the room before guests arrive.
- How long does a macramé wall hanging take to make?
- A small hanging takes two or three evenings for a beginner, including the first rough attempt. Budget time for two attempts: the first teaches the knots, the second is the keeper. Trim fringe slowly, stepping back to check the line.
- What is the first step in home decoration?
- Edit. Remove one thing from every surface, move one piece to a different room, and live with the emptier version for a day. Editing tells you what the room actually needs, and most rooms need one statement piece, not ten small additions.