Last updated: 29 October 2026
Yes, you can clean painted walls with a microfiber cloth without damaging the paint — if you match the method to the finish. Dust first with a dry cloth, wash only where dusting leaves marks, use a barely damp cloth, work in small sections from top to bottom, and dry each section at once. The one rule that protects every finish is this: the gentler the paint, the less water and pressure it gets.
As of October 2026, Semrush shows this exact topic drawing about 3,600 searches a month in the United States, with a keyword difficulty of 25. That matters because the top results are mostly product pages, short generic guides, and videos — there is no dedicated editorial guide that walks a reader through finish-matched pressure, high-wall methods, and stain-by-stain fixes in one place. This guide fills those gaps.
Start with a dry microfiber cloth for dust. Step up to a barely damp cloth only where marks remain, and to a drop of mild dish soap in warm water only for grease or grime. Flat and matte paint get the lightest touch of all. If a mark survives two gentle attempts, stop: either accept it, or repaint that section, because a third, harder attempt is usually what damages the wall.
Disclosure: As an Amazon Associate, StyleBloom earns from qualifying purchases made through links on this page, at no extra cost to you. Links below are Amazon search links so you can compare current options; no product here is presented as tested by us.
Walls collect dust, cooking film, fingerprints, scuffs, and splash marks slowly, which is why most people only notice them when sunlight hits at an angle. The single most common wall-cleaning mistake is skipping the dusting step and going straight to a wet cloth. Dust mixed with water becomes muddy streaks, and those streaks then need a second clean to remove. A dry microfiber cloth, or a vacuum with a brush attachment, removes loose dust and cobwebs first, so the damp pass that follows works on actual marks instead of spreading dirt around.
It depends on the room how dirty a wall gets. Hallways collect scuffs from bags, shoes, and furniture. Kitchens collect a thin grease film near the stove that you may not see until you wipe it. Bathrooms collect humidity and splash marks. Children's rooms collect fingerprints at exactly the height a small hand reaches. Knowing which kind of dirt you are facing matters, because dust, grease, and scuffs each respond to a different level of cleaning — and using the strongest level on the lightest dirt is how paint gets damaged.
Paint finish is the one fact you must know before water touches a wall. Flat and matte finishes have almost no sheen, hide imperfections well, and are the most fragile: scrubbing can burnish them, leaving a shiny patch that looks worse than the mark you removed. Eggshell and satin sit in the middle and tolerate gentle washing. Semi-gloss and high-gloss finishes are the most durable and the easiest to wipe down, which is why they are common in kitchens and bathrooms. If you do not know your finish, look at how light reflects: a wall that looks chalky and absorbs light is flat or matte, while a wall with a visible shine is satin or glossier.
When in doubt, treat the wall as flat. A method gentle enough for flat paint will not harm a glossier finish, while a method made for gloss can damage flat paint in one pass. Always spot-test in a hidden area — behind furniture, inside a closet, or near a baseboard — and let the spot dry fully before judging it. Color lift, a change in shine, or a softened feel all mean the method is too strong for that wall.
| Finish | Water | Pressure | What to avoid |
|---|---|---|---|
| Flat / matte | Dry dust; barely damp only | Light dabbing, no scrubbing | Magic erasers, solvents, hard scrubbing |
| Eggshell | Barely damp cloth | Gentle wiping | Magic erasers, abrasive pads |
| Satin | Damp cloth, mild soap if needed | Moderate wiping | Abrasive pads, strong solvents |
| Semi-gloss / gloss | Damp cloth, mild soap | Firmer wiping allowed | Steel wool, harsh chemicals |
Another way to identify a finish is to look at an existing touch-up or a painted sample card from the same paint line, if you still have one. Paint cans often name the finish on the label — flat, matte, eggshell, satin, semi-gloss, or gloss — and a photo of that label saved on your phone settles every future cleaning question for that room. If you repaint any wall, write the finish on the back of a light-switch plate or keep the can label, because the finish is the one detail you will need again and the easiest to lose.
Walls are large, so cloth size and reach matter more than they do on a mirror. A large, flat microfiber cloth covers more wall per pass and stays flatter against the surface than a small, thick cloth, which tends to bunch and leave uneven pressure. For dusting, a dry flat cloth or a microfiber duster works well. For washing, a flat-weave cloth wrung until it feels almost dry is the safest choice on flat paint, while a slightly thicker general-purpose cloth is fine on gloss finishes where durability matters more than delicacy.
Color matters too, and this is a gap most guides skip. A dark or brightly dyed cloth can transfer dye onto a light wall, especially when damp. White or light-colored cloths remove that risk entirely, and they have a second advantage: you can see the dirt you picked up, which tells you when to refold to a clean face. Reserve your wall cloths for walls, and keep them separate from kitchen and car cloths, so grit from another job never reaches a painted surface.
For whole walls, a flat mop head with a microfiber pad beats a hand cloth on speed and evenness, and it is the tool that makes high walls possible without a ladder. The pad should be damp, not wet, and the mop should glide rather than press. A mop head also keeps your hands off the wall, which matters on tall stairwell walls where a hand cloth forces awkward reaching.
It depends on how much wall you are cleaning. A hand cloth is best for spot work, trim, and one wall at a time, because you can feel the pressure and change to a clean face often. A flat-mop pad is best for whole walls and ceilings: it covers more wall per pass, keeps pressure even, and, on an extension pole, reaches high walls without a ladder. Pad size is a trade-off, not a bigger-is-better rule. A wider pad finishes a long flat wall faster but is clumsy in corners and around trim, while a narrower pad gives more control in tight spots and stairwells. Handle length matters the same way: an adjustable pole that lets you reach the top of the wall with your feet flat on the floor is the safe choice, and any setup that has you stretching, leaning, or standing on furniture is the wrong setup. A wall-wash system — a bucket, a wringer, and a mop with washable pads — earns its place when you clean walls room by room: rinse the pad often, wring it until it feels barely damp, and swap to a clean pad when the first one stops picking up dirt. For a single hallway wall, a hand cloth is enough; for a whole house, or for walls you otherwise skip because they are high, a mop system is what turns the job from an ordeal into a routine.
Work from top to bottom, in small sections, and never let a section stay wet while you move on to the next. Drips that land on a wall you have not cleaned yet settle into dust and become harder to remove, while drips on a wall you already cleaned wipe away easily. That is why the top-down rule appears in nearly every painter's guide, and why it earns its place here.
First, dust the whole wall dry, including corners, the top edge near the ceiling, and around light switches and outlets. Protect the floor with a towel along the baseboard to catch drips. Second, prepare two cloths or pads: one barely damp with plain warm water, and one dry. For light marks, the plain-water cloth is often enough. Third, wipe one section at a time — roughly an arm's width — with light, overlapping strokes, using the cloth flat rather than bunched. Fourth, rinse the section with a clean damp cloth in plain water, then dry it at once with the dry cloth. Only then move to the next section.
It depends on the dirt whether soap enters the picture. Dust and fingerprints usually need no soap at all. Light grime responds to a few drops of mild dish soap in warm water. Grease needs soap, and it needs patience more than pressure: a second gentle pass beats one hard scrub. After any soap pass, rinse with plain water and dry, because soap film left to dry on paint attracts dust and looks streaky in side light.
The two-bucket habit makes the rinse step honest. One bucket holds your wash water, and a second holds clean rinse water, so the cloth you rinse with is never dipped back into dirty water. On a single wall this sounds fussy, but on several walls it is what keeps the last wall as clean as the first. Wring the rinse cloth well, wipe the section once, and then dry it with the dry cloth before moving on. If your dry cloth becomes damp halfway through a wall, switch to a fresh one: a damp drying cloth stops drying and starts spreading moisture.
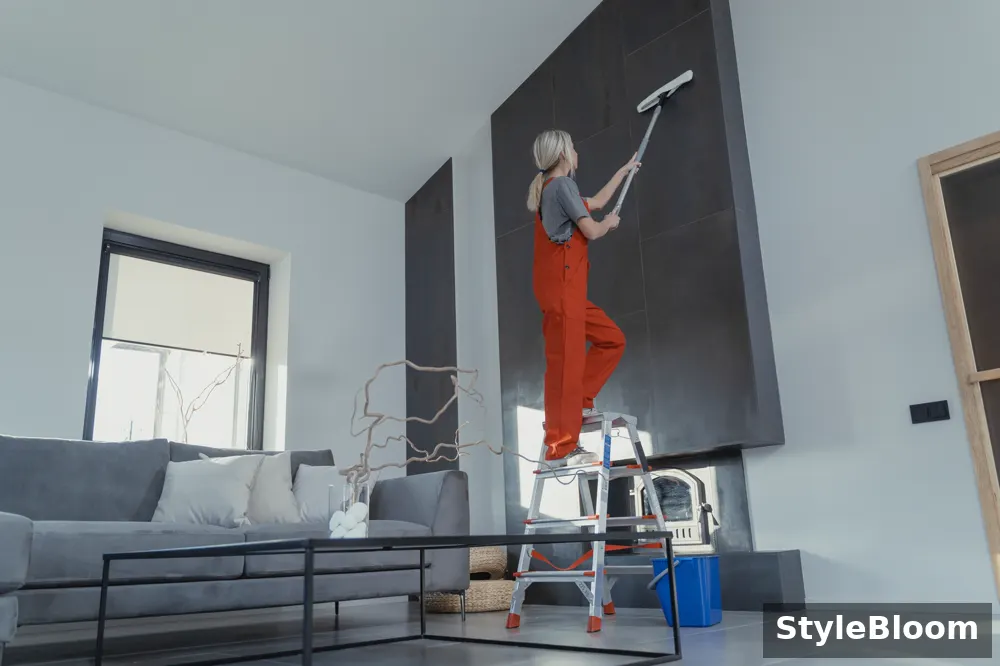
High walls are where most people either skip cleaning or climb somewhere unsafe. A flat mop head on an extension pole solves both problems. Wrap a dry microfiber pad around the head for dusting, then switch to a barely damp pad for washing, and work in small top-down sections just as you would by hand. Wipe the pad often, because a dirty pad on a high wall is hard to inspect from the ground, and dirt you cannot see is dirt you will spread.
Stairwells deserve extra care: keep your feet on a flat, stable surface, never balance on a stair tread with a pole in both hands, and clean the highest sections from the landing above where possible. If a section is genuinely out of safe reach, leave it. No clean wall is worth a fall, and a professional with proper equipment can reach what a pole cannot.
Most wall guides give one generic wash and leave the reader to guess at stains. Use this table instead, and always spot-test first on the finish you actually have.
| Stain | First try | If that fails |
|---|---|---|
| Fingerprints and light smudges | Barely damp microfiber cloth | Drop of mild dish soap in warm water |
| Scuff marks | Barely damp cloth, gentle dabbing | Baking soda paste, tested first |
| Crayon | Barely damp cloth | Baking soda paste, gentle wiping |
| Kitchen grease film | Warm water with mild dish soap | Second gentle pass, then rinse and dry |
| Food splatter | Damp cloth, soften first | Mild soap solution, rinse and dry |
| Pencil marks | Dry microfiber cloth, light wiping | Baking soda paste, tested first |
| Small mould or mildew spots | Damp cloth with mild soap, ventilate, dry fully | If spots return or spread, find the moisture source; do not keep wiping |
Two cautions belong with this table. First, baking soda paste is mildly abrasive: it helps on scuffs and crayon precisely because it has some bite, which is also why it must be tested on flat and matte paint before wider use. Second, never reach for a magic eraser on flat, matte, or eggshell paint. A magic eraser works by physically abrading the surface, and on a delicate finish it removes paint along with the mark, leaving a lighter, duller patch that cannot be wiped away.
Smoke film and water stains sit outside this table on purpose. A yellow-brown film from smoke or cooking over years often needs a sealing primer and repainting, because surface washing lightens it without removing the stain locked in the paint. Water stains — brown rings or tide lines from a leak — likewise point to moisture behind the paint, and washing the surface will not fix the cause. In both cases, cleaning first to see what remains is reasonable, but planning a repaint after the cause is resolved is the honest endpoint, not a failure of the cleaning method.
It depends on the material whether any of this method applies. Washable vinyl wallpaper tolerates a barely damp microfiber cloth, wiped gently and dried at once. Uncoated paper wallpaper should only be dusted dry — moisture can stain it, loosen paste, or tear it. If you do not know which kind you have, dust only, and check the maker's care guidance before water touches it. The same caution applies to fabric wall coverings and grasscloth, which are dust-only surfaces.
Wood paneling can be wiped with a barely damp cloth and dried at once, but never soaked, because moisture swells wood and lifts finishes. Tile walls, by contrast, are the most forgiving surface in the house: a microfiber cloth with mild soap handles tile well, and grout lines may need a soft brush where a cloth cannot reach. The point is not that one method fits all walls — it is that the method must match the surface, and the surface must be identified first.
Textured walls trap dust in their crevices, so the dry step matters even more there. Dust a textured surface first with a soft brush or a dry microfiber duster that reaches into the texture, then wipe with a barely damp flat cloth using light, even pressure — scrubbing the raised parts harder than the hollows wears the texture unevenly. Bare, unpainted plaster is a dust-only surface: it absorbs water readily, so a damp cloth can leave marks or soften the surface, and stains on bare plaster are usually a priming and painting job, not a washing job. Exterior walls are outside this guide's scope for large areas. Weather, exterior paint types, and outdoor mildew behave differently from interior walls, and a small interior spot-clean does not scale to a whole exterior wall. For a small spot on exterior painted trim, the same gentle rules apply — spot-test, barely damp cloth, dry at once — but for a full exterior wall, or for mildew that keeps returning outdoors, get advice for exterior surfaces rather than extending the interior method.
Kitchen walls near the stove collect a thin grease film that builds up invisibly and then attracts dust, so the wall looks dull even when it is not visibly dirty. Warm water with a few drops of mild dish soap on a microfiber cloth cuts that film, and the cloth's fibers lift it rather than spreading it around the way a sponge can. Work in small sections, rinse with plain water, and dry each section, because soap left on a kitchen wall attracts the next layer of grease faster.
If a grease film survives one soap pass, do a second gentle pass rather than scrubbing harder. Repeated gentle passes remove layered film without threatening the finish, while one hard scrub on flat paint near a stove can burnish the exact spot you most want clean. Behind the stove, where heat and grease combine, check the paint's condition first: heat-damaged or peeling paint should be left alone and repainted, not washed.
Tile backsplashes next to the stove are a different surface from the painted wall above them, and they can take a firmer wipe with the same microfiber cloth and soap solution. The grout lines between tiles, though, trap grease that a flat cloth skims over, so a soft brush or an old toothbrush on the grout, followed by a microfiber wipe, finishes the job. Do not let grout cleaner or tile spray drift onto the painted wall above, because products made for tile are often too strong for paint.
Bathroom walls live in humidity, so drying matters even more here than elsewhere. Ventilate during and after cleaning — run the fan, open a window if you have one — and dry every section fully, because a wall left damp in a humid room stays damp, and damp walls grow problems. Small surface spots of mildew can be wiped with a damp cloth and mild soap, with the room ventilated and the wall dried fully afterward.
Be honest about the limits of wiping. Large, spreading, or recurring mold, mold behind paint or wallpaper, or a musty smell that returns after cleaning are not cleaning problems — they are moisture problems, and they need professional advice about the source of the moisture, not repeated wiping. Never mix cleaning products, never use bleach on a wall without ventilation and the maker's guidance, and keep children and pets out of the room while any stronger product is in use.
These are Amazon search links so you can compare current listings, sizes, and pack counts yourself. Each pick carries a best-for label, and none is presented as tested by us.
Judge cloths by cost per use, not by the pack alone. A bulk pack looks economical, but it only saves money if you actually rotate and wash the cloths and keep them reserved for walls; a pack that sits unused, or cloths ruined by softener or by grit from other jobs, cost more than a smaller set that is used well. A cloth has earned replacement when it feels slick after washing, sheds fibers onto a light wall, or stops picking up dust even when clean and softener-free. Durability is judged by that performance, not by a wash count on a label, because washing habits and wall soil differ too much for one number to be honest.
Dusting feels like a wasted step. It is the step that prevents muddy streaks, and skipping it is the most common reason a wall wash looks worse than the wall did before. Five minutes of dry dusting saves a second full wash.
A sponge worked fine for years. A sponge can work, and on durable gloss finishes it often does. Microfiber earns its place on walls because it lifts dirt into its fibers instead of pushing it around, and because a flat microfiber pad covers a wall more evenly than a sponge. If your sponge method already gives clean, undamaged walls, keep it — this guide is for readers whose walls are streaking or whose paint is at risk.
Plain water cannot clean a wall. Plain water handles dust and light marks well, and that covers most of what a wall actually needs. Soap enters only for grease and grime, and that order — water first, soap only where needed — is what keeps paint safe.
I already damaged a spot by scrubbing. A burnished patch on flat paint cannot be wiped back to matte, because the finish itself has changed. The honest fix is touch-up paint on that spot, feathered carefully, or a full repaint of that wall. Learn the pressure lesson once, and the next wall stays safe.
Wall washing takes too long. It takes long when the whole house is done at once. Done one wall at a time, with dusting folded into regular cleaning, a single wall takes about fifteen minutes, and high-traffic walls done twice a year stay manageable.
Can I use vinegar on walls? Vinegar mixed with water can cut light grime, but it is not needed for most wall cleaning, and on flat or matte paint it adds risk without adding much cleaning power. Mild dish soap in warm water does the same job more gently, and plain water does most of the rest. If a guide tells you vinegar is required for walls, it is overstating the case.
My walls are textured. Does this method still work? Lightly textured walls — orange-peel or knockdown finishes — work with the same method, but the cloth catches more on the texture, so use a slightly thicker cloth and expect to rinse it more often. Heavily textured or popcorn surfaces trap dust in their crevices, and a dry microfiber duster or vacuum brush does most of the work there; wet washing a popcorn ceiling or wall risks softening the texture itself, so dust-only is the safer choice.
Skip washing and plan a repaint when cleaning lifts color onto the cloth, when a stain remains after two gentle attempts, when the finish is already burnished or worn through, or when paint is peeling, bubbling, or water-stained. Washing a damaged wall does not repair it, and scrubbing a stain that will not lift only widens the damaged area. The same applies to smoke damage and deep nicotine staining, which usually need sealing primer and repainting rather than surface cleaning.
Also skip washing when the wall's problem is behind the surface: a damp patch that returns after drying, a bulge, or a smell that persists after cleaning all point to moisture or structural causes that wiping cannot fix. In those cases, find the cause first, then repaint after it is resolved.
Pick one hallway wall, ideally the one you pass most often, and give it the full method once. Dust it dry from top to bottom, spot-test behind the nearest door frame, then wash one section at a time with a barely damp cloth, rinsing and drying each section before moving on. Fifteen minutes is enough for one wall, and the result teaches the feel of the method: how damp barely damp really is, how little pressure flat paint needs, and how different a wall looks when each section is dried at once.
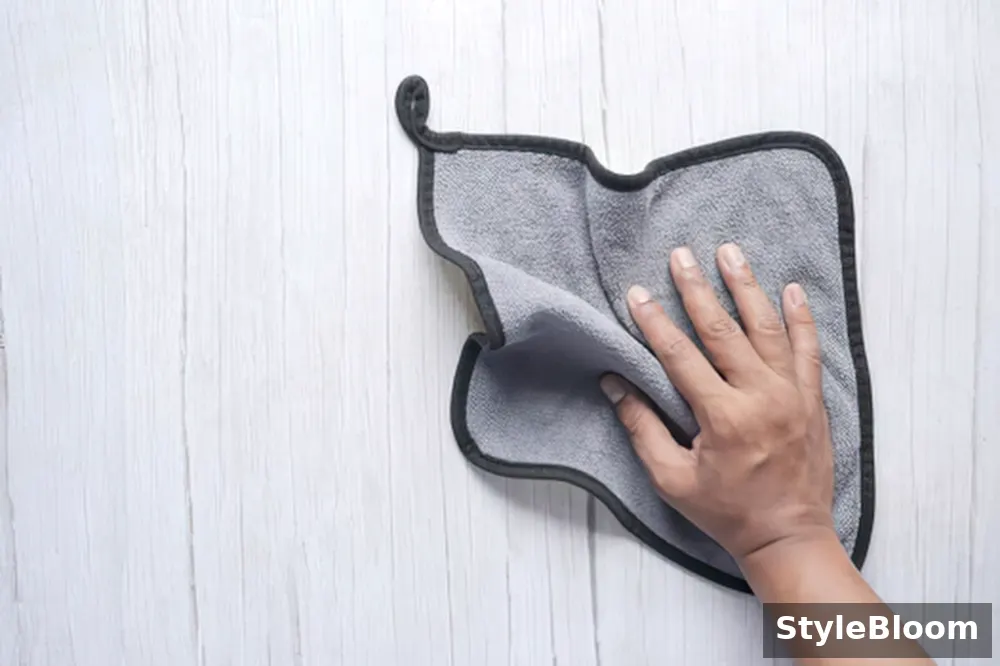
Wall cloths collect dust, grease, and paint residue, so wash them separately from linty laundry, kitchen towels, and car cloths. Use a normal detergent without added softener, skip fabric softener and dryer sheets entirely, and air dry or tumble dry on low heat. High heat can mat the split fibers and shorten a cloth's life, while softener coats the fibers so the cloth smears instead of cleaning.
Store wall cloths dry, folded, and separate from other cleaning cloths, ideally in a labeled spot, and keep white wall cloths apart from dyed cloths so no dye migrates in storage. Replace a cloth when it stays stiff after washing, smells even when clean, leaves lint, or stops picking up dust. A worn cloth on a wall spreads dirt instead of lifting it, and no method fixes that.
Keep a small rotation rather than one favorite cloth. Two or three wall cloths in use, with clean spares folded nearby, mean you never press a dirty cloth back into service because the clean one is in the wash. Label the storage spot — a shelf, a basket, or a zip bag — so wall cloths do not drift into the kitchen or car pile, where they pick up grease or grit that later reaches a painted wall. This sounds like housekeeping fuss, but it is the difference between a cloth that cleans and a cloth that spreads.
| What you see | Likely cause | Fix |
|---|---|---|
| Muddy streaks after washing | Wall was not dusted first | Let dry, dust dry, then re-wash in sections |
| Shiny patch on flat paint | Burnishing from hard scrubbing | Cannot be wiped away; touch-up paint needed |
| Color on the cloth | Paint lifting; method too strong | Stop at once; repaint that section |
| Soap film in side light | Soap not rinsed off | Rinse with plain water and dry at once |
| Dye marks on a light wall | Dyed cloth transferred color | Switch to white cloths; re-wash the mark gently |
| Stain returns after cleaning | Moisture or grease source remains | Find the source; repaint if damage is deep |
This guide started with the top-ranking wall-cleaning pages, read inside rather than skimmed from headlines, and it attacks the gaps those pages leave: finish-matched pressure in a table, high-wall methods without a ladder, a stain-by-stain table, wallpaper and paneling distinctions, mold limits stated honestly, and picks with best-for labels. Search demand figures come from Semrush data as of October 2026. No product in the picks section was lab-tested for this guide, and no pick is presented as tested; the picks are search links so you can compare current listings yourself. Where a guide disagreed with painter guidance — most sharply on magic erasers — this guide follows the painters and says so plainly. If a claim here turns out to be wrong for your wall, the paint maker's guidance for that finish outranks this guide.
A clean wall is a gentle wall: dust first, wash only where dusting leaves marks, use a barely damp cloth, match pressure to the finish, work in small top-down sections, and dry each section at once. Flat and matte paint get the lightest touch, gloss finishes tolerate more, and wallpaper is a different surface with its own rules. Start with one hallway wall tonight, keep your wall cloths clean and softener-free, and let the troubleshooting table settle any problem that remains. Your walls do not need stronger chemicals. They need less water, less pressure, and a dry cloth that follows at once.

Yes. A clean, soft microfiber cloth is one of the gentlest tools for painted walls, used dry for dust and barely damp for light grime, with pressure matched to the paint finish. Flat and matte finishes need the lightest touch, while satin and gloss finishes tolerate firmer wiping. Always spot-test in a hidden area first, and stop if color transfers onto the cloth.
Start dry for dust, then go barely damp only where dusting leaves marks. Walls should never stay wet, so wring the cloth until it feels almost dry and dry each section after washing it. A wall left damp in a humid room stays damp, which invites streaks and, in bathrooms, mildew.
A soft, clean microfiber cloth used lightly will not damage flat or matte paint, but hard scrubbing can burnish it and leave a shiny patch that cannot be wiped away. Use minimal water, light pressure, and a spot test on flat finishes, and never use a magic eraser or abrasive pad on them.
Dust first, then wash in small sections from top to bottom with a barely damp cloth, rinse with a clean damp cloth, and dry each section at once so no area stays wet long enough to streak. Working top-down matters because drips on an already-cleaned section wipe away easily, while drips on a dusty section settle in.
Wrap a microfiber cloth or mop pad around a flat mop head on an extension pole, and work in small top-down sections. This reaches ceilings and stairwells safely without climbing. Keep your feet on a flat, stable surface, and leave any section that is genuinely out of safe reach.
Yes, a few drops of mild dish soap in warm water is enough for most wall grime. Rinse with plain water afterward so no soap film dries on the paint, because dried soap attracts dust and looks streaky in side light. Soap is for grease and grime; dust and fingerprints usually need no soap at all.
Dab a barely damp microfiber cloth with a little baking soda paste on the scuff, test a hidden spot first, and wipe gently. Avoid magic erasers on flat or matte paint, where they abrade the finish. If a scuff survives two gentle attempts, stop — a harder attempt usually damages the paint around the scuff.
Try a barely damp microfiber cloth first, then a baking soda paste for what remains, testing a hidden spot first. Work gently on flat paint, and never scrub hard enough to lift color. On gloss finishes, crayon usually lifts more easily, but the same gentle order still applies.
Only on durable semi-gloss or gloss finishes, and only with a spot test first. A magic eraser physically abrades the surface, so it can dull or lighten flat, matte, and eggshell paint. If you are unsure of the finish, treat the wall as flat and skip the eraser entirely.
Use warm water with a few drops of mild dish soap on a microfiber cloth, work in small sections, rinse with plain water, and dry each section. Stubborn grease may need a second gentle pass rather than harder scrubbing, because repeated gentle passes remove layered film without threatening the finish.
Small surface spots can be wiped with a damp cloth and mild soap, with the room ventilated and the wall dried fully. Large, spreading, or recurring mold needs professional advice, not repeated wiping, because the cause is usually moisture behind the surface rather than dirt on it.
It depends on the wallpaper. Washable vinyl wallpaper tolerates a barely damp cloth, while uncoated paper wallpaper should only be dusted dry. Check the maker's care guidance before any moisture touches wallpaper, and if you do not know which kind you have, dust only.
Dust walls every few months, spot-clean marks as they appear, and wash high-traffic walls such as kitchens and hallways once or twice a year. Regular dusting keeps full washes short and gentle, which is what protects the paint over time.
Wash wall cloths separately from linty laundry, without fabric softener or dryer sheets, and air dry or tumble dry on low heat. A cloth washed with softener smears instead of cleaning, and a cloth stored with dyed laundry can pick up dye that later transfers to a light wall.
Repaint when cleaning lifts color, when stains remain after two gentle attempts, when the finish is burnished or worn through, or when damage such as peeling or water staining is present. Washing a damaged wall does not repair it, and scrubbing a stain that will not lift only widens the damaged area.