Published October 29, 2026
Short answer: the best clip-in hair extensions for most women in the USA are a Remy human-hair set in a length close to your own hair — usually 16 to 18 inches for volume, 20 to 22 inches for real length — in a weight matched to your hair's thickness, not your ambition. Clip-ins win because they are the only extension method you can put in yourself in ten minutes, take out at night, and reuse for months, with no glue, no heat bonding, and no salon appointment. Everything below is about choosing the right set the first time, because the most common regret with clip-ins is not the brand — it is buying too long, too heavy, or the wrong color.
Do not start by shopping for a brand. Start by naming your goal, because the right length and weight follow from it. This is the table most guides bury or skip entirely.
| Your goal | Best length | Best weight | Best construction | Search on Amazon |
|---|---|---|---|---|
| Volume only, same length | Your current length | 80–120g | Seamless or classic weft | Volume clip-ins |
| Noticeable length, natural look | 16–18 inches | 120–160g | Remy human hair, double weft | 18-inch Remy sets |
| Dramatic long hair | 20–22 inches | 160–220g | Remy human hair, full set | 22-inch sets |
| Thin or fine hair | 14–18 inches | 80–120g | Seamless, silicone-lined clips | Seamless sets for thin hair |
| Short hair (bob or above) | 12–16 inches | 100–140g | Seamless, shorter wefts | Sets for short hair |
| Curly or wavy hair | Match your curl, not straight length | 120–180g | Curly-textured Remy sets | Curly clip-ins |
| Budget first try | 16–18 inches | 100–120g | Human-synthetic blend (no high heat) | Blend sets |
The pattern to notice: length and weight move together. Longer hair needs more grams to keep the ends looking full instead of wispy, and that is exactly why a 22-inch set on fine hair so often looks wrong — not because the hair is bad, but because the weight and the length were chosen for someone else's head.
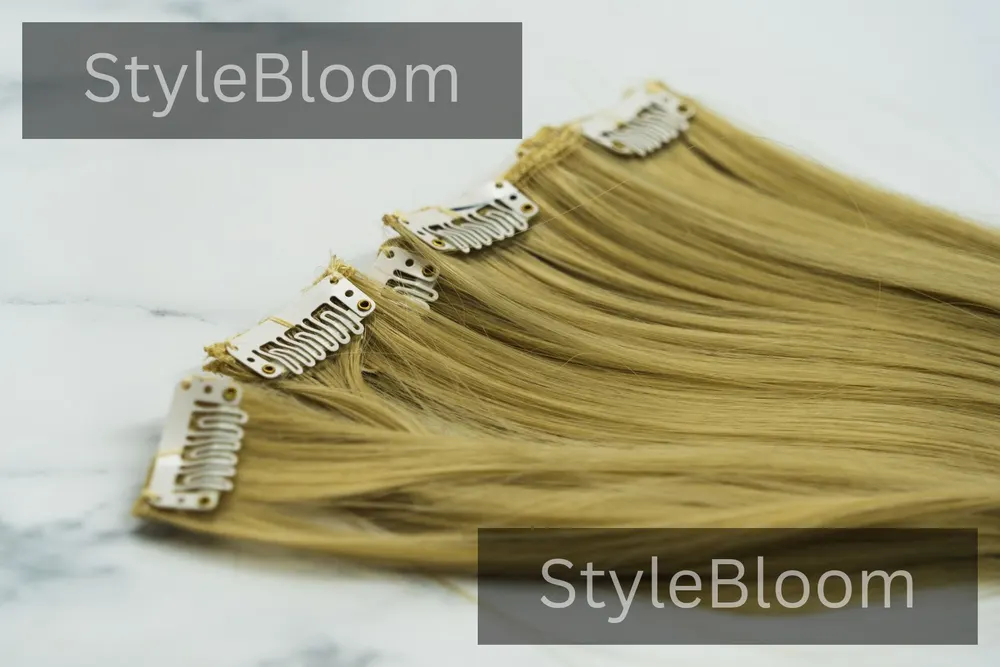
Clip-in extensions are wefts of hair — strips with small clips sewn along the top edge — that you snap onto sections of your own hair and remove at night. A standard set has 7 to 10 wefts of different widths. No adhesive, no heat, no chemicals, and no waiting weeks for a salon appointment. That reversibility is the whole point: you can wear them for a wedding on Saturday, take them out on Sunday, and your own hair is exactly where you left it.
They are the right choice if you want occasional length or volume, if you are trying extensions for the first time, if your hair is growing out a cut you regret, or if you want to test a longer look before committing to anything semi-permanent. They are also the kindest option for hair that is already stressed, because there is no tension while you sleep — you simply take them out.
They are the wrong choice if you want to wake up every day with long hair and never think about it. Clip-ins are a daily ritual, even a quick one, and if you know you will not do ten minutes of clipping most mornings, a semi-permanent method will serve you better. They are also a poor fit for hair shorter than about three to four inches, because there is not enough of your own hair to hide the clips and anchor the wefts — more on that in the short-hair section. And if you swim daily or train hard every day, be honest with yourself: extensions that must come out before water and heavy sweat will spend more time in their bag than on your head.
One more honest note, because guides rarely say it: a set of clip-ins will not fix hair loss, thinning at the crown, or a medical hair condition, and clips placed on fragile, breaking hair can make shedding worse. If your hair is falling out in patches or your scalp is sore, see a dermatologist before buying anything that clips to it.
Human hair is the better product in almost every way that matters, and the more expensive one for real reasons. Remy human hair — where the cuticles run in the same direction — tangles less, moves like your own hair, and can be curled, straightened, and colored within reason. Non-Remy human hair is cheaper because the cuticles point every which way, which is why it mats faster. Virgin hair, never chemically processed, is the most natural and the longest-lasting, and also the most expensive — more than most first-time buyers need.
Synthetic hair has one real advantage: price. A synthetic set costs a fraction of a human-hair set, and for a single event or a costume look, that can be the right call. Its limits are hard limits, though. Most synthetic fiber cannot take a curling iron or straightener — heat melts it — so what you buy is the style you get. It also has a tell-tale shine in daylight that reads as "extensions" from across a room, and it does not last as long. Mixed human-synthetic blends sit in the middle: more realistic than pure synthetic, cheaper than full human hair, but check the human-hair percentage before you buy, and treat them as no-heat or low-heat only unless the listing clearly says otherwise.
My honest rule: if you will wear them more than a few times, buy human hair. The cost per wear drops below the cheap set very fast, because the cheap set is the one you stop wearing. If this is a one-night experiment, buy the blend, enjoy the evening, and spend the savings on the human-hair set once you know you actually like wearing extensions.
Heat deserves its own sentence, because it is where people ruin sets. Human hair takes heat the way your own hair does — with protectant, and not every day at the highest setting. Synthetic generally does not take heat at all. And never bleach extensions to fix a wrong color: bleaching eats extension hair far faster than your own, and the result is usually dry, uneven, and shorter than you planned. Buy the right color instead, using the color section below.
Extension length is the length of the weft hair itself, and the lowest weft sits near the nape of your neck — so you measure from the nape, not from the crown of your head. The easiest method: hold a tape measure at the nape, run it down your back, and see where 14, 16, 18, 20, and 22 inches actually land on your body. Your height changes where a length falls, which is why two women buying the same "18-inch" set can end up with visibly different results.
As a rough map on an average-height woman: 12 inches thickens a bob or shorter cut; 14 to 16 inches adds subtle length or volume around the shoulders; 18 to 20 inches is the most popular range, falling around the bust; 22 inches and beyond is dramatic, waist-skimming territory. But the map is only a starting point — your own tape measure beats any chart.
The rule that matters most is the step rule: stay within about four inches of your natural length if you want the blend to look natural. The bigger the jump, the harder it is to hide the line where your hair ends and the extensions carry on, especially in fine hair, where there is less of your own hair to cover the join. This is why the most flattering first set is almost never the longest one in the store. A realistic step longer than your own hair, blended well, looks better than dramatic length with a visible shelf at the ends.
Length also interacts with your haircut. Blunt, one-length cuts are the hardest to blend, because the extensions have to match a hard line; layered cuts are far more forgiving, because the layers break up the join. If your hair is blunt and you want a long set, plan for a trim — either ask a stylist to blend the extensions into your cut, or have the extensions themselves lightly layered. Many stylists will do this for a small fee, and it is the single highest-value step for a natural result.
Finally, think about your daily life, not just the mirror. Very long extensions catch on bag straps, seatbelts, and coat collars, and they take longer to wash and dry. If you are buying for everyday wear rather than occasions, the length you will actually keep wearing is usually two inches shorter than the length you first fall in love with in photos.
Weight, measured in grams, is how much hair is in the set — and it decides how thick your ends look. Too little weight and long extensions taper to wispy ends; too much weight and fine hair gets dragged down, clips show, and your scalp aches by afternoon. Match weight to your density, not to your goal.
| Your hair | Volume set | 16–18 inch set | 20–22 inch set |
|---|---|---|---|
| Fine / thin | 80–100g | 100–130g | 140–170g (only if blended carefully) |
| Medium | 100–120g | 120–160g | 160–200g |
| Thick / dense | 120–150g | 150–180g | 180–220g |
An honest caveat, because guides disagree here and you should know it: some sellers recommend 160 grams or more for fine hair at 20 inches, arguing that only that much hair keeps long ends looking full. Others recommend 100 to 120 grams for fine hair at any length, arguing that comfort and invisibility matter more than full ends. Both have a point, and the disagreement tells you the real answer: at 20 inches and beyond, fine hair faces a genuine trade-off between full ends and a comfortable, hidden fit. If your hair is fine and you want long extensions, the safer first buy is 16 to 18 inches at moderate weight — you get the length look without the trade-off — and you can always add a second, lighter set later for special occasions.
Weight also climbs with length within a single product line — a brand's 16-inch set might be 105 grams while its 26-inch set is 145 grams — because longer hair needs more of it to avoid thin ends. When you compare two sets, compare grams at the same length, not the headline gram number alone. And remember that a "full set" and a "half set" are different products: if you only want volume, a smaller piece-count set at your own length is lighter, cheaper, and easier to hide than a full-length set worn for a job it was not bought for.
Thin hair and clip-ins can be a wonderful combination — but only with the right construction and placement. The rules are specific, and they are the rules most generic guides skip.
First, choose seamless or silicone-lined wefts. Traditional stitched wefts are bulkier at the root, and on thin hair that bulk is exactly what shows. Seamless wefts lie flat against the scalp, and silicone-lined clips grip without needing a thick base of hair to bite into. Second, keep the set light — around 100 to 120 grams for most thin-haired buyers — and keep the length moderate, 14 to 18 inches. Extremely long or heavy extensions overwhelm finer strands, and no amount of styling fixes a set that is visibly too much hair for the head under it.
Placement matters as much as the set. Place no weft higher than the top of your ears, and keep clips slightly lower on the head than you might expect, because hair is naturally thinner near the crown and parting. Teasing the root lightly where each clip sits gives the clip something to hold and stops slipping, and it is gentler than pulling the weft tight. Space the wefts about one and a half to two inches apart rather than stacking them — stacked wefts on fine hair create a visible ridge and concentrate weight on too few anchor points.
Color matching is also more important on thin hair, because there is less of your own hair to camouflage a mismatch — match to your ends, not your roots, as the color section explains. And if your hair is very thin or thinning at the crown, consider a halo-style piece or a topper instead of a full clip-in set for coverage at the top; clip-ins add length and volume from the sides and back, but they do not cover a thin crown well, and clips placed on a sparse crown are the ones most likely to show.
Finally, be kind to your scalp. Remove clip-ins every night, never sleep in them, and give your hair clip-free days. If you feel pulling, soreness, or see more shedding than usual after wearing a set, the set is too heavy or placed too high — lighter and lower fixes most of it.
Yes, clip-ins work on short hair — with a minimum and a method. Your hair should be at least three to four inches long, because the clips need enough of your own hair to grip and to fall over the weft tops. Below that length, the clips have nothing to hide under, and the result reads as extensions no matter how good the hair is.
For a bob or shorter cut, buy 12 to 16 inches, not 22. The step rule is brutal on short hair: a bob jumping to waist length leaves a hard, visible line where your short hair ends, and the extensions hang like a curtain behind it. A 14- or 16-inch set that adds volume and a few inches blends far more believably, and it is the length you will actually wear daily. If your heart is set on long hair, grow your own hair to at least shoulder length first, or accept that you will need a stylist to layer and blend the set aggressively.
Placement on short hair goes lower and tighter than on long hair: start the first weft at the nape, keep wefts close together at the back where your hair is densest, and leave your own top layer long enough to fall over the highest clips. Your own hair on top is the camouflage — if your top layer is very short or heavily layered, keep the top wefts out and use fewer pieces. A trick that helps enormously: curl your own ends and the extension ends together in the same curl, so they move as one piece instead of two layers.
Blunt bobs deserve a special warning. A blunt cut plus straight, blunt-ended extensions is the hardest combination to make look natural, because two hard lines sit on top of each other. If your bob is blunt, either choose a set with tapered or layered ends, or have the extensions trimmed with long layers to break the line. It is a small adjustment that changes the whole result.
Curly hair changes the buying decision in one fundamental way: you must match the curl, not just the color. A straight set on curly hair will never blend, no matter how good the color match, because the textures move differently and separate the moment you walk outside. Buy a curly- or wavy-textured set whose curl pattern is close to yours — and judge it by your hair's pattern on a normal day, not its pattern fresh out of a straightener.
Length works differently on curls, too. Curly hair springs up, so a "20-inch" curly set will look several inches shorter once it dries into its pattern. If you want the hair to fall to a certain point, buy longer than you would for straight hair, and measure the set stretched, not curled. Many curly buyers also find that fewer, thicker wefts blend better than many fine ones, because curly hair's volume hides weft edges more forgivingly than straight hair does.
Blending curly extensions is mostly about styling them together: wash and condition your hair and the extensions with the same routine, apply the same curl cream or gel, and let them dry together so the curl pattern sets as one. Diffusing helps. Straightening your own hair to match straight extensions is the alternative, but if you straighten daily, you are back to heat on your own hair every day — which defeats one of the reasons people choose clip-ins.
One caution specific to curly sets: do not brush them dry. Brushing dry curly extensions turns them into frizz, exactly like brushing your own dry curls. Finger-detangle or use a wide-tooth comb while damp, and store them in a loose braid or twist so the pattern survives between wears.
Color is where most first sets go wrong, and it is almost always fixable before you buy. The single most important rule: match to your ends, not your roots. Your ends are what the extensions hang next to, and they are what other people see. Roots are darker on almost everyone, and matching to them gives you extensions that look too dark from the shoulders down.
Judge color in natural daylight, not bathroom light. Hold the shade swatch — or, if you are buying online, hold a photo of the shade on your phone is not enough; order a color ring or swatch set if the seller offers one — against your ends near a window. Indoor lighting warms everything and hides mismatches that daylight exposes instantly. If your hair is highlighted or balayaged, do not buy a single flat color: buy the shade that matches the majority of your ends, or buy a balayage set whose gradient runs the same direction as yours, darkest at the top. A flat dark set under highlighted ends looks like two different heads of hair.
If you are between shades, buy the lighter one. Extensions can be toned darker more easily than lightened, and a slightly lighter set blends better than a slightly darker one, because darker pieces read as shadows and draw the eye. Gray and silver hair deserves the same logic: match the silver or gray tone of your ends, and avoid "ash blonde" sets that read yellow against real gray.
And a hard rule worth repeating: never bleach extensions to fix a wrong color. Extension hair is already processed, and bleach takes it from wrong-color to damaged-and-wrong-color in one session. Return or exchange the set instead — and check the seller's return policy before you buy, because many sellers do not accept returns on opened hair for hygiene reasons. That policy is the reason to get the color right first, not the reason to panic after.
Your first application takes about twenty minutes. By the third time, it takes ten. Work from the bottom up, and do not rush the sectioning — clean sections are what keep clips hidden.
Step 1: Start with dry, brushed, product-free hair. Clip-ins go into dry hair, never wet, because wet hair stretches and the clips slip as it dries. Brush everything out so there are no tangles for the clips to catch on.
Step 2: Section off the bottom layer. Part your hair horizontally at the nape and clip the top hair up and out of the way. You are creating a clean shelf for the first weft to sit on.
Step 3: Lightly tease the root where each clip will sit. A few gentle backcombing strokes give the clip grip. On fine hair this step is not optional — it is what stops sliding.
Step 4: Clip the widest weft at the nape first. Open the clips, slide them onto the teased section close to the scalp, and snap them shut. The weft should feel secure without pulling. If it hurts, it is too tight or too high — move it down.
Step 5: Work upward in horizontal sections. Let down the next layer, tease, clip the next weft, and repeat. Keep wefts below the tops of your ears and leave enough of your own hair on top to fall over the highest clips.
Step 6: Place the small side pieces last. The narrow two-clip wefts frame your face and fill the sides. Angle them slightly so they follow your hairline rather than sitting in a straight row.
Step 7: Brush through gently and style together. Brush from the ends upward with a soft brush, then curl or straighten your own hair and the extensions together in the same pass. This is the step that turns two layers into one head of hair.
If a clip keeps slipping, the cause is almost always one of three things: the section was too thick for the clip to bite, the root was not teased, or the weft is too heavy for that spot. Move it lower, tease more, or swap it for a narrower piece — do not just clamp harder, because a clip forced onto too much hair is the one that breaks strands.
Blending is a skill, not a purchase, and it is where most "do extensions look fake?" anxiety actually lives. The first trick is the top layer: your own hair on top must be long enough and thick enough to cover the highest weft. If it is not, wear fewer wefts and keep them lower — a slightly less full result that looks real beats a fuller result with visible clips every time.
The second trick is styling together. Never style your hair and then lay untouched extensions under it. Curl or wave both in the same sections, with the same tool and temperature, so the texture matches. If you straighten, straighten both. If you wear waves, wave both. Mismatched texture is visible from across a room even when the color is perfect.
The third trick is the ends. Extensions fresh out of the pack often have blunt, even ends that look nothing like natural hair, which tapers. A light point-cut or long layers on the extensions — done by a stylist, or carefully at home only if you are confident — breaks the blunt line and is the difference between "great hair" and "great extensions." Similarly, if your own hair has layers, your extensions need layers at roughly the same places, or the join shows every time you move.
The fourth trick is the parting. A hard middle or side part with extensions underneath can expose weft tops near the crown. A slightly zigzag part, or a softer, less severe part line, hides the highest clips without any extra product. And the fifth trick is the simplest: check yourself in daylight and from behind. Bathroom mirrors lie — they show you the front, in warm light, at close range. Daylight and a back view show you what everyone else actually sees.
Human-hair clip-ins last six to twelve months with normal occasional wear, because they are not washed as often as your own hair and they rest at night. Wash them only when they need it — roughly every fifteen to twenty wears, or when product build-up makes them feel heavy. Wash in lukewarm water with sulfate-free shampoo, stroking downward, never bunching or scrubbing, which tangles the wefts. Condition from mid-length to ends, rinse, and let them air-dry on a flat towel or a hanger. Heat-drying is possible but shortens their life, and high heat on a regular basis is what turns soft extensions dry and brittle.
Between wears, brush gently from the ends upward with a soft-bristle or loop brush, never a fine-tooth comb on dry hair. Store them flat or hanging, not balled in a drawer, and braid long sets loosely before storing so they do not tangle into a single knot. Keep them away from chlorinated and salt water — swim without them if you can — and if they do get wet, rinse with fresh water and air-dry before storing.
Clips themselves need occasional care too. If a clip stops snapping shut firmly, it can usually be bent gently back into shape or replaced — replacement clips are inexpensive and sold in packs, and swapping a tired clip is far cheaper than replacing a set. Check the stitching where clips meet the weft every few months; a loose clip that pulls free mid-day is an avoidable embarrassment.
The most expensive mistake is buying twice: first the cheap set that disappoints, then the good set you should have bought. If you know you will wear extensions regularly, the human-hair set is the cheaper purchase over a year, because it is the one still in use in month six. The second most expensive mistake is color — and it is entirely avoidable with daylight, ends-matching, and the lighter-shade rule.
Another quiet mistake: wearing every piece every time. A full set is a maximum, not a requirement. Most days, most women look better with five or six wefts well placed than with ten wefts fighting for space. Use fewer pieces for everyday volume, save the full set for occasions, and your clips will stay hidden and your scalp will stay comfortable.
Finally, do not ignore pain. Clips should feel present, not painful. Headaches, sore spots, or a line of tenderness where a weft sat are your scalp telling you the set is too heavy, too high, or worn too long. Lighter, lower, and fewer pieces fix nearly all of it — and clip-free days are part of healthy extension wear, not a failure of it.
Tape-ins are thin wefts taped to your own hair by a stylist and left in for six to eight weeks. They look extremely natural and need no daily effort, but they cost far more over a year, require salon visits for every move-up, and the adhesive and removal process stress fine hair. Halos are a single weft on a wire that sits on your head like a headband — the easiest option of all, genuinely one-minute application, but the least secure, the least versatile for updos, and the most likely to shift.
Clip-ins sit in the middle on every axis: more effort than a halo, less than tape-ins; more secure than a halo, less permanent than tape-ins; cheaper over time than tape-ins, pricier than a single halo. For a first-time buyer, that middle is the right place to start, because it is the only option you can fully reverse tonight if you change your mind. If you later decide you want wake-up-and-go hair every day, you will make that decision knowing exactly what length, weight, and color suit you — because your clip-in set taught you.
One more comparison worth making: clip-ins versus doing nothing. If your goal is one wedding, one photoshoot, or one evening of feeling like yourself with longer hair, clip-ins are the lowest-risk way to get there. No appointment, no grow-out, no damage to undo. That reversibility is not a compromise — for occasional wear, it is the feature.
Buy this: a Remy human-hair clip-in set, 16 to 18 inches, in a weight matched to your thickness (100–130g for fine hair, 120–160g for medium), in a seamless construction if your hair is thin, matched to your ends in daylight. It is the set most women actually keep wearing.
Go longer only if: your own hair is already past your shoulders, your hair is medium or thick, and you have a plan to blend the ends with layers.
Go cheaper only if: this is a one-night experiment — buy a blend, enjoy it, and upgrade when you know you like wearing extensions.
Skip: the longest, heaviest set on your first buy; any set whose color you matched under bathroom lights; and any set you cannot return if the color is wrong.
Start with the comparison table at the top, use the search links to compare current sets and prices, and remember the order that matters: goal first, then length, then weight, then color. Get those four right and the brand almost takes care of itself.
Clip-ins are the lowest-damage extension method when used correctly, because they come out every night and use no glue or heat. Damage happens when sets are too heavy, placed too high, or worn to sleep — keep them light, low, and out at night, and give your hair clip-free days.
Human-hair sets typically last six to twelve months with occasional wear, because they are washed less often than your own hair and rest at night. Synthetic sets last less long and cannot be heat-styled, which is part of why human hair works out cheaper per wear.
For a first set, buy within about four inches of your natural length — usually 16 to 18 inches. Dramatic jumps look hard to blend, especially on fine hair, and a realistic step blended well looks better than long hair with a visible line.
Match grams to your hair's thickness: fine hair 80–120g, medium hair 120–160g, thick hair 150–220g, with longer lengths needing more grams to keep the ends full. When in doubt, go lighter — you can add pieces, but you cannot make a heavy set comfortable.
Yes, with seamless or silicone-lined wefts, a light set around 100 to 120 grams, moderate length of 14 to 18 inches, and placement no higher than the tops of your ears. Teasing the root lightly stops slipping without pulling.
Yes, if your hair is at least three to four inches long. Buy 12 to 16 inches, keep wefts low and close at the back, and let your own top layer fall over the clips. A bob jumping straight to waist length is the hardest blend to pull off.
Yes, but match the curl pattern, not just the color — a straight set on curly hair never blends. Buy a curly-textured set, allow for spring-up when choosing length, and style your hair and the extensions together so they dry into one pattern.
Match to your ends, not your roots, in natural daylight. If your hair is highlighted or balayaged, buy a shade matching the majority of your ends or a balayage set with the same gradient direction. If you are between shades, buy the lighter one.
Human-hair extensions can be heat-styled like your own hair, with protectant and moderate heat. Most synthetic extensions cannot take heat at all and will melt or frizz, so check the listing before using any hot tool.
No — always take them out before bed. Sleeping in clip-ins tangles the hair, strains the clips, and puts hours of tension on the anchor points, which is how breakage happens. Nightly removal is the main reason clip-ins are so gentle on your hair.
Yes, about every fifteen to twenty wears or when they feel heavy with product. Wash in lukewarm water with sulfate-free shampoo, stroking downward, condition mid-length to ends, and air-dry flat. Do not bunch or scrub them, which causes tangling.
For regular wear, yes. Remy hair has cuticles aligned in one direction, so it tangles less, moves naturally, and lasts longer than non-Remy hair. The cost per wear usually drops below a cheap set within months, because the cheap set is the one you stop wearing.
The usual causes are a section too thick for the clip to grip, an unteased root, or a weft too heavy for that spot. Tease the root lightly, use a thinner section, move the weft lower, or swap to a narrower piece — do not just clamp harder.
It depends on the seller — many do not accept returns on opened hair for hygiene reasons. Check the return policy before you buy, and get the color right first with daylight matching to your ends or a swatch set.
Yes. Clip-ins need no salon visit, no adhesive, and no commitment — you can put them in yourself in ten minutes and take them out at night. Tape-ins look natural and need no daily effort, but they cost more over time and require salon move-ups.